Search This Blog and The Web

Showing posts with label Newborn. Show all posts

Socks From Leftover Yarn For 3-6 Month Old Babies

You probably will see more baby patterns on my blog for a while. That's because our friend had a baby and I love to knit for babies.

Here are another tiny socks knitted from a leftover yarn (which I used to knit my daughter's boyfriend's socks). Unfortunately, I can't remember the brand of the yarn. Although I  tried to search for this particular color I just didn't find any image online. The closest was the "Wisdom Yarns" sock yarn. 

I believe that you could use basically any sock yarn to knit these socks for about 3 months old baby.  

My next project will be socks for 6-9 months old rascal.


Material:
  • Yarn: leftover sock yarn (any sock yarn)
  • Knitting needles 2.75 mm - either DPNs or Circular - whichever ones you prefer
  • Scissors
  • Yarn Needle

Size:
  • Length of the sole (heel to toe): ~3.5” (you can make it longer if you chose so)
  • Ankle Area: ~ circumference of K1/P1 ribbing is 4"(unstretched) to ~6" (stretched)
  • Ribbing (Cuff) Height: 2.75”
  • Heel Flap: 0.75"
  • Sole width: 2” flat; (circumference is ~ 4+”)

Gouge:

On knitting needles 2.75mm - 1” x 1” = 7 sts x 10 rows (in stockinette stitch)


Abbreviation:

DPN(s) - double-pointed needle(s)
CO - cast on
K - knit
P - purl
sl 1st st - slip first stitch purl-wise
SSK - slip knit-wise, slip knit-wise, and then knit them together through the back loop
P2tog - purl two stitches together
K2tog - knit two stitches together
RS - right side
WS - wrong side
st(s) - stitch(es)


Step-by-Step Directions:

Make 2.

Foundation: cast on 36 stitches

  • The Cuff
Rnd 1          *[K1, P1]* - to end of the row, then distribute the stitches evenly, among 3 or 4 DPNs (or use either 2 pairs of short circular needles or circular needles with a long cable), without twisting your knitted row, join stitches into a circle

Rnd 2-26      *[K1, P1]* - to end of each row. Make your cuff as long as you want. I knitted my cuff 2.75" long.

  • The Heel Flap
If knitting on DPN's divide your stitches as such: needle #1 (the heel flap needle) - 18 sts, and needles #2 and #3 - 9 sts. If you are using circular needles you most likely have stitches divided to 18 + 18 between your magic loops.

Row 27-34      Work on your first 18 sts only back and forth (NOT in the round) - *[K1, P1]* - 9x

  • Turning The Heel (row by row)
Keep working your sock back and forth (NOT in the round), starting with Row 1.

Row 1     (RS) sl. 1st st, K9, SSK, K1, (5 sts left on the needle), turn
Row 2     (WS) sl. 1st st, P3, P2tog, P1, (5 sts left on the needle), turn
Row 3     (RS) sl. 1st st, K4, SSK, K1, (3 sts left on the needle), turn
Row 4     (WS) sl. 1st st, P5, P2tog, P1, (3 sts left on the needle), turn
Row 5     (RS) sl. 1st st, K6, SSK, K1 (1 sts left on the needle), turn
Row 6     (WS) sl. 1st st, P7, P2tog, P1 (1 sts left on the needle), turn
Row 7     (RS) sl. 1st st, K8, SSK, (0 sts left on the needle), turn
Row 8     (WS) sl. 1st st, P8, P2tog, (0 sts left on the needle), turn

  • The Gusset (knit in the round)
Note: you will work from now on RS only in the round.

You should finish with 10 sts on your working needle, and you are ready to pick up stitches along the sides of your flap. You will proceed as such (starting with Rnd 1 again):

Rnd 1             K10, PU 6, K18, PU 6
Rnd 2             K14, K2tog, K18, SSK, K4
Rnd 3             K38
Rnd 4             K13, K2tog, K18, SSK, K3
Rnd 5             K36
Rnd 6             K12, K2tog, K18, SSK, K2
Rnd 7             K34
Rnd 8             K11, K2tog, K18,  Note: This is the end of your row. We will start a new row after this point. 

  • The Foot Part
Rnd 9             Note: Move your last 3 stitches to your next (= first) needle, this will be your new beginning, then SSK, K1, K30 (total 32 sts)
Rnd 10-21     K32

Note: To make your socks a little longer add 1+ more rows.
 
  • The Toe Part
Let's start with Rnd 1 again.

Rnd 1           *[K1, K2tog, K10, SSK, K1]* - 2x
Rnd 2          K28
Rnd 3           *[K1, K2tog, K8, SSK, K1]* - 2x
Rnd 4          K24
Rnd 5           *[K1, K2tog, K6, SSK, K1]* - 2x (20 sts)
Rnd 6           *[K1, K2tog, K4, SSK, K1]* - 2x (16 sts)

  • To Finish Each Sock:
Bind off using Kitchener Stitch. In order to close your toe gap with Kitchener stitch, you need your first 8 stitches lined up with your next 8 stitches. Cut off about 1/2 a foot-long tail, thread it into your yarn needle, and using the Kitchener Stitch close the toe gap. Weave in all the ends/tails. 


Copyright:
You may not sell my written pattern to anyone, and you may not publish it as your own.
However, you may sell a finished product (socks) made by you.

Thank you.
***

DID YOU FIND ERRORS? Let me know on what page of my blog, and in which row by clicking HERE, and I will fix it as soon as I get to it. You can PM me on my FB Page HERE as well. Txs!
Also if you haven't subscribed to my HandmadeRukodelky Channel, you can do it HERE. There are many videos to be seen, too.

*******************************************************************************


Copyright page - click HERE


PLEASE, COMMENT ON YOUTUBE BELOW MY VIDEOS, AND/OR SHARE YOUR IMAGES OF YOUR RECREATED WORKS ON MY FB PAGE HERE :-)


Note: Most of the time I work as fast as I can to keep up with knitting and crocheting requests. I have to videotape, edit videos, then convert them & upload them to my channel. After that often I post on my blog patterns. I answer many questions, which means that often I work up to 16 hours a day. I would tremendously appreciate IF anyone of you who finds an error in the written pattern, so please, let me know - where (what rows) and what may be the problem. Many future knitters & crocheters from our artsy and crafty virtual world will thank you for your good deed, including myself.


Marigolds By The Lake - Baby Set


MISTI ALPACA - a wonderfully soft yarn for any baby project. This is a sock yarn, but it is so soft that any baby will love to wear it. The yarn is 50% Alpaca, 30% Merino, 10% silk, and 10% Nylon. You cannot go wrong.

I am a big fan - look for a video where I will show you my niece's baby wearing the hat, gloves, and socks I knitted as a gift. 

Should you want to knit it yourself here is a link to a free pattern in my RAVELRY SHOP.

Enjoy.


IF YOU'D LOVE TO KNIT ALONG WITH MY VIDEOS, VISIT MY YOUTUBE CHANNEL. There are many videos for right-handed knitters and for left-handed knitters as well.

Copyright:
You may NOT sell my written pattern or publish it as YOUR own.
However, you may sell a finished product (socks) you made.

Thank you.
***

DID YOU FIND ERRORS? Let me know on what page of my blog, and in which row by clicking HERE, and I will fix it as soon as I get to it. You can PM me on my FB Page HERE as well. Txs!
Also if you haven't subscribed to my HandmadeRukodelky Channel, you can do it HERE. There are many videos to be seen, too.

*******************************************************************************


Copyright page - click HERE


PLEASE, COMMENT ON YOUTUBE BELOW MY VIDEOS, AND/OR SHARE YOUR IMAGES OF YOUR RECREATED WORKS ON MY FB PAGE HERE :-)


Note: Most of the time I work as fast as I can to keep up with knitting and crocheting requests. I have to videotape, edit videos, then convert them & upload them to my channel. After that often I post on my blog patterns. I answer many questions, which means that often I work up to 16 hours a day. I would tremendously appreciate IF anyone of you who finds an error in the written pattern, so please, let me know - where (what rows) and what may be the problem. Many future knitters & crocheters from our artsy and crafty virtual world will thank you for your good deed, including myself.

Tiny Baby Socks

Tiny Baby Socks © HandmadeRukodelky 2020
I have written several simple sock patterns that I published on my blog.

Today, I would like to introduce you to my newest simple sock pattern for tiny babies. I knitted these socks with DK weight yarn, which is not too thin but not too thick to work with either. So if you are a seasoned knitter that would like to learn how to knit socks, you could start with socks for babies using semi-thin yarn. When you learn these basics you can move onto larger socks and then with more experience onto complex ones. 

Is this written pattern giving you a hard time? Do you prefer knitting along with videos? I have two of them - one for righties and one for lefties. Simply click on my video and knit with me. 

Should you want to knit baby shorts from the same yarn - CLICK HERE.

Enjoy. Good Luck.


Material:

Size:
  • Length of the sole (heel to toe): ~3.25” (you can make it longer if you chose so)
  • Ankle Area: ~ circumference of K1/P1 ribbing is 4"(unstretched) to ~5.5" (stretched)
  • Ribbing (Cuff) Height: 2.25”
  • Heel Flap: 0.75"
  • Sole width: 2” flat; (circumference is ~ 4+”)

Gouge:

On knitting needles #5 (3.75mm) - 1” x 1” = 6 sts x 8 rows (in stockinette stitch)


Abbreviation:

DPN(s) - double-pointed needle(s)
CO - cast on
K - knit
P - purl
sl 1st st - slip first stitch purl-wise
SSK - slip knit-wise, slip knit-wise, and then knit them together through the back loop
P2tog - purl two stitches together
K2tog - knit two stitches together
RS - right side
WS - wrong side
st(s) - stitch(es)
N1, N2, N3, N4 - if knitting with DPNs - needle #1, #2, #3, #4 respectively


Step-by-Step Directions:

Make 2.

Foundation: cast on 28 stitches

  • The Cuff
Rnd 1          *[K1, P1]* - to end of the row, then distribute the stitches evenly, among 4 DPNs (or use either 2 pairs of short circular needles or circular needles with a long cable), without twisting your knitted row, join stitches into a circle

Rnd 2-20      *[K1, P1]* - to end of each row. Make your cuff as long as you want. I knitted my cuff about 2.25" long.

  • The Heel Flap
If knitting on DPN's divide your stitches as such: needles #1 and #2 - 10 sts each, needle #3 - 8 sts. If you are using circular needles you most likely have stitches divided to 14 + 14 between your magic loops.

Row 21-26      Work on your first 14 sts only back and forth (NOT in the round) - *[K1, P1]* - 7x

  • Turning The Heel (row by row)
Keep working your sock back and forth (NOT in the round), starting with Row 1.

Row 1     (RS) sl. 1st st, K7, SSK, K1, (3 sts left on the needle), turn
Row 2     (WS) sl. 1st st, P3, P2tog, P1, (3 sts left on the needle), turn
Row 3     (RS) sl. 1st st, K4, SSK, K1, (1 sts left on the needle), turn
Row 4     (WS) sl. 1st st, P5, P2tog, P1, (1 sts left on the needle), turn
Row 5     (RS) sl. 1st st, K6, SSK, (0 sts left on the needle), turn
Row 6     (WS) sl. 1st st, P6, P2tog, (0 sts left on the needle), turn

  • The Gusset (knit in the round)
Note: you will work from now on RS only in the round.

You should finish with 8 sts on your working needle, and you are ready to pick up stitches along the sides of your flap. You will proceed as such (starting with Rnd 1 again):

Rnd 1             K8, PU 5, K14, PU 5
Rnd 2             K11, K2tog, K14, SSK, K3
Rnd 3             K30
Rnd 4             K10, K2tog, K14, SSK, K2
Rnd 5             K28
Rnd 6             K9, K2tog, K14,  Note: This is the end of your row. We will start a new row after this point. If you are knitting on DPNs reshuffle your stitches to N1 (first 10 stitches), then split your 14 sts between N2 and N3

  • The Foot Part
Rnd 7             SSK, K1 (Note: add these two stitches to N1), K24 (total 26 sts)
Rnd 8-12        K26
Rnd 13           (N1) K12; (N2) K2tog, K5; (N3) K5, SSK; (total 24 sts)
Rnd 14-15      K24
Note: To make your socks a little longer add as many rows as needed.
 
  • The Toe Part
Let's start with Rnd 1 again.

Rnd 1           *[K2tog, K8, SSK]* - 2x
Rnd 2          K20
Rnd 3           *[K2tog, K6, SSK]* - 2x
Rnd 4          K16
Rnd 5           *[K2tog, K4, SSK]* - 2x

  • To Finish Each Sock:
In order to close your toe gap with Kitchener stitch, you need 6 stitches lined up with the other 6 stitches. You have first 6 sts on the first needle already, but you need to place the next 6 sts (from needles #2 and #3) on another needle. Cut off about 1/2 a foot-long tail, thread it into your yarn needle, and using the Kitchener Stitch close the toe gap. Weave in all the ends/tails. 


Copyright:
You may not sell my written pattern to anyone, and you may not publish it as your own.
However, you may sell a finished product (socks) made by you.

Thank you.
***

DID YOU FIND ERRORS? Let me know on what page of my blog, and in which row by clicking HERE, and I will fix it as soon as I get to it. You can PM me on my FB Page HERE as well. Txs!
Also if you haven't subscribed to my HandmadeRukodelky Channel, you can do it HERE. There are many videos to be seen, too.

*******************************************************************************


Copyright page - click HERE


PLEASE, COMMENT ON YOUTUBE BELOW MY VIDEOS, AND/OR SHARE YOUR IMAGES OF YOUR RECREATED WORKS ON MY FB PAGE HERE :-)


Note: Most of the time I work as fast as I can to keep up with knitting and crocheting requests. I have to videotape, edit videos, then convert them & upload them to my channel. After that often I post on my blog patterns. I answer many questions, which means that often I work up to 16 hours a day. I would tremendously appreciate IF anyone of you who finds an error in the written pattern, so please, let me know - where (what rows) and what may be the problem. Many future knitters & crocheters from our artsy and crafty virtual world will thank you for your good deed, including myself.


Knitted "Breezy Day Shorts" Pattern

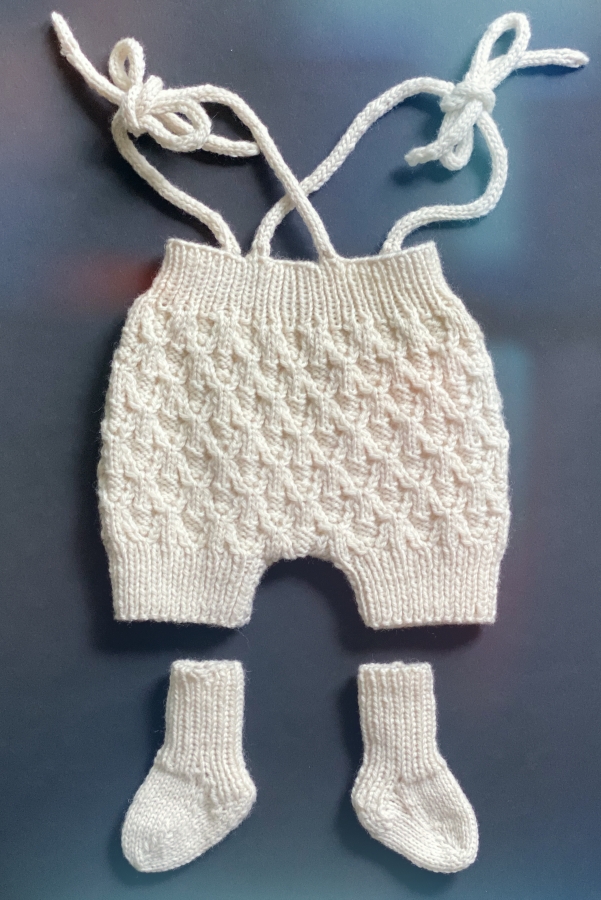
Who doesn't love to knit for babies? It is so much fun. And when my friends tell me someone in their family is expecting, I start thinking about a new design. I love to make them something special. Something no one has yet.
My friend will have a baby closer to the fall - when the weather is changing all the time. When hot days replace cool days or nights. When babies may need something warmer, but still semi-summery. With all that on my mind, I designed these tiny shorts (and then knitted socks to go with them).

As I was working on my design, I recorded my progress not only on the paper but I videotaped the knitting tutorial as well. And here I am sharing my project with you.

You will need 1 skein of DK yarn. If you would like to knit socks also then you will need a few more yards of the second skein.

The shorts may be slightly big for a newborn, but perfectly fine on a 3 months old baby. However, some babies are born bigger than others, so keep that in mind.
There is a FREE PATTERN for baby socks on THIS PAGE


"BREEZY DAY SHORTS" PATTERN ( on RAVELRY)   


Materials:


Size:

0-3 months;
Waist - up to 18”
Hip circumference - 20+”
Leg circumference - up to 11”
Rise - 14” (waist to crotch - 6.75”)


Gouge (stockinette stitch):

On knitting needles #5 (3.75mm) - 1” x 1” = 6 sts x 8 rows


***

DID YOU FIND ERRORS? Let me know on what page of my blog, and in which row by clicking HERE, and I will fix it as soon as I get to it. You can PM me on my FB Page HERE as well. Txs!
Also if you haven't subscribed to my HandmadeRukodelky Channel, you can do it HERE. There are many videos to be seen, too.

*******************************************************************************


Copyright page - click HERE


PLEASE, COMMENT ON YOUTUBE BELOW MY VIDEOS, AND/OR SHARE YOUR IMAGES OF YOUR RECREATED WORKS ON MY FB PAGE HERE :-)


Note: Most of the time I work as fast as I can to keep up with knitting and crocheting requests. I have to videotape, edit videos, then convert them & upload them to my channel. After that often I post on my blog patterns. I answer many questions, which means that often I work up to 16 hours a day. I would tremendously appreciate IF anyone of you who finds an error in the written pattern, so please, let me know - where (what rows) and what may be the problem. Many future knitters & crocheters from our artsy and crafty virtual world will thank you for your good deed, including myself.


Tiny Baby Espadrilles

I have been knitting and crocheting baby shoes on and off for quite some time. A while ago I decided to crochet tiny baby espadrilles. As I was crocheting I made videos for right-handed and left-handed crocheters. I wrote a pattern for these tiny "cuties" you see in the image and a pattern below - but I forgot to finish it and publish it.
It is interesting how life gets in the way of my projects. Luckily, this pattern will see the light of the day because one of the crocheter artists asked me about the pattern for these smallest sizes espadrilles. As I was researching my published blogs, this unpublished write up came up. So here you go - below is the free written pattern, and in THIS PLAYLIST YOU WILL FIND VIDEOS FOR RIGHTIES, WHICH GOES WITH THIS PATTERN (and more).
Please be aware - since I wrote this pattern a long time ago, I am not sure how accurate it is - so if anyone finds ANY errata - PLEASE LET ME KNOW.  Help me correct it, and help your fellow crocheters so they can crochet without frustrations 🌹Thank you and happy crocheting.

LEFTIES WILL FIND THEIR PLAYLIST HERE!


Materials (if you shop via affiliated links below you could help fund my future projects TXS):
Michaels on line store, OR Hobby Lobby, OR Jo-Ann Fabrics, OR Walmart 

Afghan yarn, worsted #4 (ie. Loops & Threads "Impeccable" - I used Soft Taupe color for the soles and off-white for the top and heel)
hook - US size G,  4 mm
scissors
sewing/yarn needle for weaving the ends in


Size:
Length of the espadrilles is 4"


Step-by-Step:

Soles: make 4

color #1 (light brown)

Foundation: ch8

Row 1         3 hdc into 3rd chain st from hook, 1 hdc into next 4 ch st, 6 hdc into next st; next crochet 1 hdc in the next 4sts on the opposite side of initial foundation chain, 3 hdc in next st, join
Row 2         ch 2, 2 hdc in each of next 3 st, 1 sc into each of next 5 sts, 2 sc into each of next 4 sts, 1 sc into each of next 5 sts, 2 hdc into each of next 3 sts, join
Row 3          ch2, *[2 hdc into next st, 1 hdc into next st]* - 3x; 1 sc into each of next 6 sts, 2 sc into each of next 6 sts, 1 sc into each of next 6 sts,  *[1 hdc into next st, 2 hdc int next st]* - 3x; join

Place 2 soles with wrong side on top of each other and slip stitch them together with light brown yarn (insert your hook between two stitch of both soles at the same time and pull yarn through, then insert the hook between two stitches of both soles and pull yarn through soles and the stitch - repeat all around the perimeter. Do the same with the other pair. Weave in all the ends.

Top of the espadrilles

color #2 (cream)

With the right side up, and the tip part toward you find the center of the front. Count 10 stitches to the left from the center and place the marker. Then count 10 stitches to the right (from the center) and place the marker. You should have total 20 stitches.

Row 1 (RS)            Starting at the stitch where you placed your right marker (heel pointed to the right, tip of the sole to the left) crochet 1 sc in each stitch 20x. Turn.
Row 2 (WS)           1 sc in each st - 20x
Row 3 (RS)            2scTog - 2x, *[skip st, puff st]* - 5x, skip st, 2scTog - 2x, sl st into last st
Row 4 (WS)           1 sc in each of next 10 sts
Row 5 (RS)            2scTog, *[skip st, puff st]* - 2x, skip st,  2scTog, sl st into last st
Row 6 (WS)           1 sc in each of 4 sts, sl st along the edge and into the sole
Row 7 (RS)            *[crochet 3 chain picot, make 3 sl st along the edge]* - 5x, finish with 3 chain picot, sl stitch into the sole.


Heel

color #2 (cream)

With the right side up, and heel part facing away from you find the center of the heel. Count 8 stitches to the left from the center and place the marker. Then count 9 stitches to the right (from the center) and place the marker. You should have total 17 stitches.

Row 1 (RS)            Starting at the stitch where you placed your left marker (heel pointed to the left, tip of the sole to the right) crochet 1 sc in each of the 17 sts. Turn.
Row 2 (WS)           1 sc in each of 17 sts
Row 3 (RS)            1 sc in each of 7 sts, 3scTog, 1 sc in each of 7 sts (total 15 sts)
Row 4 (WS)           1 sc in each of 15 sts
Row 5 (RS)             1 sc in each of 6 sts, 3scTog, 1 sc in each of 6 sts (total 13 sts)

After you are finished with the row continue to crochet ch45 (= 45 chain sts). This will be your string tie. Cut your yarn off. make another string yarn (ch45) to the other side of the corner.

Weave in all ends.


***

DID YOU FIND ERRORS? Let me know on what page of my blog, and in which row by clicking HERE, and I will fix it as soon as I get to it. You can PM me on my FB Page HERE as well. Txs!
Also if you haven't subscribed to my HandmadeRukodelky Channel, you can do it HERE. There are many videos to be seen, too.

*******************************************************************************


Copyright page - click HERE


PLEASE, COMMENT ON YOUTUBE BELOW MY VIDEOS, AND/OR SHARE YOUR IMAGES OF YOUR RECREATED WORKS ON MY FB PAGE HERE :-)


Note: Most of the time I work as fast as I can to keep up with knitting and crocheting requests. I have to videotape, edit videos, then convert them & upload them to my channel. After that often I post on my blog patterns. I answer many questions, which means that often I work up to 16 hours a day. I would tremendously appreciate IF anyone of you who finds an error in the written pattern, so please, let me know - where (what rows) and what may be the problem. Many future knitters & crocheters from our artsy and crafty virtual world will thank you for your good deed, including myself.
Little Hats Big Hearts Project - Red Hat 4 Newborns


UPDATE:
PLEASE BE AWARE THAT AMERICAN HEART ASSOCIATION DOESN'T ACCEPT THESE HATS ANYMORE. INSTEAD, THEY ACCEPT FINANCIAL DONATIONS AND/OR VOLUNTEER HELP. YOU CAN KNIT THESE AS A VALENTINE'S GIFT. ❤️❤️❤️

A couple of months ago, my friend (fabulous and talented Iris) shared a link to the "LITTLE HATS BIG HEARTS" project with me. In it, the AMERICAN HEART ASSOCIATION asked knitters and crocheters in the US to make red hats for NEWBORN BABIES to raise awareness for "Congenital Heart Defects."
The requested specifics are that yarn needs to be: red, cotton, or acrylic, medium to heavyweight, and machine washable and dryable.
I got excited about this project and decided not only to make these hats, but also to write two patterns for my followers (one for hat knitted in the round, and one for hat knitted on straight knitting needles), and make three videos of hats - one knitted with DPNs, one knitted with circulars and one knitted on straight needles. And on top of that, these three videos for right-handed edit also for left-handed knitters (total six videos).
Although I am not very strong in the English style of knitting, I included a few times both versions - the Continental style of knitting and English too.

For the two hats knitted either with DPNs or circular needles, you need to know how to knit in the round. The hat knitted on straight needles is more comfortable to knit, but then you have to deal with a seam. However, all you need to know, to knit these hats, is how to cast on, how to knit and purl, how to bind off, and for hat knitted flat also how to sew or crochet the two side seams together.

I know it is already February, and hospitals may not accept hats anymore (please check either with your local hospital OR with American Heart Association if they are still accepting hats in your area). However, you could make a newborn hat with hearts for Valentine's baby, or for your family member or a friend that will be Mom soon.

This hat is not only great for spreading awareness about "Congenital Heart Defects," but also just for giving a hat with heart - also a meaning for LOVE. And while you are reading this, please, check out my "SHAKEN BABY SYNDROME PURPLE HAT" post - which I wrote a while back about another so much needed awareness. There is a free written pattern, plus links to videos for right-handed and left-handed knitters. Spread the love, and spread the wisdom you learn from reading educational articles online (click on the provided links throughout this article).

Thank you all.

BELOW ARE LINKS FOR THE SIX VIDEOS - FOR RIGHTIES AND LEFTIES: 

CLICK HERE FOR HAT #1 KNITTED ON DPNs FOR RIGHTIES
CLICK HERE FOR HAT #1 KNITTED ON DPNs FOR LEFTIES

CLICK HERE FOR HAT #2 KNITTED ON CIRCULARS FOR RIGHTIES
CLICK HERE FOR HAT #2 KNITTED ON CIRCULARS FOR LEFTIES
In these two videos, you will see a good demonstration of using a so-called "magic loop" while knitting with circular needles.

CLICK HERE FOR HAT #3 KNITTED ON STRAIGHT NEEDLES FOR RIGHTIES
CLICK HERE FOR HAT #3 KNITTED ON STRAIGHT NEEDLES FOR LEFTIES


Abbreviations:
CO - cast on
DPN - double pointed needles
K - knit
P - purl
M - marker
K2tog - knit 2 stitches together
BO - bind off by pulling yarn through remaining sts
sl sts - slip stitches

Gauge:
My gauge corresponds to a manufacturer's gauge on any yarn label

Materials (if you shop online via my affiliated links below, I would get few pennies, which would help to fund my future projects TXS):
Michaels online store, OR Hobby Lobby, OR Jo-Ann Fabrics, OR Walmart 
Yarn - any washable red, acrylic, medium weight (#4, worsted) - see below which ones I used
Knitting needles - all these hats were knitted on same sized needles: US #7 (4.5mm)
Hook - I used 4mm hook
Yarn Needle (for weaving in the tail, optional)
Scissors

Size:
Circumference: 12"-13"
Height: 5"


HAT #1 - KNITTED ON DPNs - about 1/4 ball of yarn by Loops & Threads, Impeccable; medium worsted #4; color Cherry; 100% acrylic
&
HAT #2 - KNITTED ON CIRCULARS - about 1/4 ball of yarn by Red Heart, Super Saver; medium worsted #4; color Hot Red; 100% acrylic

HAT #1

HAT #2


Step-by-Step:

CO 54 sts on long needles (4.5 mm)

Row 1              knit the first row of ribbing as such: *(K1, P1)* - repeat to end; then distribute stitches evenly among 3 DPNs (18-18-18 sts on each needle), OR move your sts onto your circular knitting needles; then join into circle (make sure stitches are not twisted when joining)
Rnd 2-8           *(K1, P1)* - repeat 27x in each row
Rnd 9-11          K54, in 11th round place M every 9 sts
Rnd 12-13        *[K4, P1, K4]* - 6x
Rnd 14-15        *[K3, P3, K3]* - 6x
Rnd 16-17        *[K2, P5, K2]* - 6x
Rnd 18-19        *[K1, P7, K1]* - 6x
Rnd 20-21        *[K1, P3, K1, P3, K1]* - 6x
Rnd 22             *[K2, P1, K3, P1, K2]* - 6x
Rnd 23-26         K54 - remove your M
Rnd 27              *[K4, K2tog]* - 9x
Rnd 28              K45
Rnd 29              *[K3, K2tog]* - 9x
Rnd 30              K36
Rnd 31              *[K2, K2tog]* - 9x
Rnd 32              K27
Rnd 33              *[K1, K2tog]* - 9x

You will have 18 sts left on your needles - elongate your last knitted stitch by pulling it and pull it through remaining stitches with a hook. Make a knot, and weave in your tails on the inside of your hat.


HAT #3 - KNITTED ON STRAIGHT KNITTING NEEDLES - about 1/4 ball of yarn by Caron, Simply Soft; medium worsted #4; color Autumn Red; 100% acrylic

HAT #3


Step-by-Step:

CO 54 sts on long needles (4.5 mm)

Row 1-8           *(K1, P1)* - repeat 27x in each row
Rnd 9               K54
Rnd 10             P 54
Rnd 11             K54
Rnd 12             P 54
Rnd 13            *[K4, P1, K4]* - 6x
Rnd 14            *[P4, K1, P4]* - 6x
Rnd 15            *[K3, P3, K3]* - 6x
Rnd 16            *[P3, K3, P3]* - 6x
Rnd 17            *[K2, P5, K2]* - 6x
Rnd 18            *[P2, K5, P2]* - 6x
Rnd 19            *[K1, P7, K1]* - 6x
Rnd 20            *[P1, K7, P1]* - 6x
Rnd 21            *[K1, P3, K1, P3, K1]* - 6x
Rnd 22            *[P1, K3, P1, K3, P1]* - 6x
Rnd 23             *[K2, P1, K3, P1, K2]* - 6x
Rnd 24             P 54 - remove your M
Rnd 25             K54
Rnd 26             P 54
Rnd 27             *[K4, K2tog]* - 9x
Rnd 28             P45
Rnd 29             *[K3, K2tog]* - 9x
Rnd 30             P36
Rnd 31             *[K2, K2tog]* - 9x
Rnd 32             P27
Rnd 33             *[K1, K2tog]* - 9x

You will have 18 sts left on your needles - elongate your last knitted stitch by pulling it and insert it through the remaining stitches with a hook. Make a knot, sew or crochet your sides together and weave in your tails on the inside of your hat. If you will crochet your sides (see the video knitting with straight needles) use sl sts - do not crochet with single crochet stitches, it would be too thick.

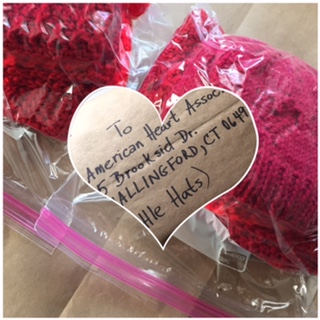
Donated hats - thank you Iris for the idea and hats!


***

DID YOU FIND ERRORS? Let me know on what page of my blog, and in which row by clicking HERE, and I will fix it as soon as I get to it. You can PM me on my FB Page HERE as well. Txs!
Also if you haven't subscribed to my HandmadeRukodelky Channel, you can do it HERE. There are many videos to be seen, too.

*******************************************************************************


Copyright page - click HERE


PLEASE, COMMENT ON YOUTUBE BELOW MY VIDEOS, AND/OR SHARE YOUR IMAGES OF YOUR RECREATED WORKS ON MY FB PAGE HERE :-)


Note: Most of the time I work as fast as I can to keep up with knitting and crocheting requests. I have to videotape, edit videos, then convert them & upload them to my channel. After that often I post on my blog patterns. I answer many questions, which means that often I work up to 16 hours a day. I would tremendously appreciate IF anyone of you who finds an error in the written pattern, so please, let me know - where (what rows) and what may be the problem. Many future knitters & crocheters from our artsy and crafty virtual world will thank you for your good deed, including myself.

Unicorn Legwarmers

Legwarmers or Armwarmers
I designed these "Sweet Taffy Legwarmers" with ballerinas on my mind. I pictured them wearing crocheted legwarmers as they practice their tendu, plie or pirouette. But let's not limit ourselves to who can wear these legwarmers and how. People that feel cold in the fall, winter, and spring (such as myself) can enjoy crocheted "legwarmers", or wear these as "armwarmers 😊 ".

This pattern is NOT for utter beginners. However, if you are a little skilled and adventurous crocheter and if you watch my video, you may be able to work on this project even if you don't have a whole lot of experience. The video is so detailed that a few less experienced crocheters may find it helpful and embrace it as a push forward to try something new.

Below you will find two patterns - one for very slim legs (mine, LOL) and one for a newborn baby. However, you can make these for anyone. If it comes to a width, first, you should crochet enough chain stitches to wrap around the widest area of your leg (upper part, or a calf). Then count them and make sure the total number is a multiple of 4 (such as 24, 36, 48, 56, 60, etc.) For example, if you make a chain of 62 sts than your nearest number to work with would be 60 sts. It is better to make it one or two stitches smaller because the legwarmers will stretch. I started legwarmers for myself with 50 stitches, but it would have been better to make 48 chain stitches to start with. It would eliminate the extra 2 stitches I had to "get rid of" when I started the design after the ribbing. I started the legwarmers for a newborn baby with 30 sts. However, to make it easier for myself I should have started it with 28 sts (for slimmer legs), or with 32 sts (for chubbier legs). Here too, I had to eliminate 2 sts when I started to crochet the design part. I will write the Newborn pattern with 28 stitches, to make it easier on you. If you want to make it for an older child, then just add one or more extra 4-chain repeats.

For the length do this: measure a distance between the upper part and the ankle area, and crochet until you reach the desired length. If you would like your legwarmers to have a gathered look, then I would make few extra rows. Good luck and enjoy.

CLICK  HERE  4  VIDEO  4  RIGHTIES
CLICK  HERE  4  VIDEO  4  LEFTIES


If you'd shop yarn on-line via my affiliate links below, I'd get few pennies, which would help to fund my future projects TXS):
Michaels online store, OR Hobby Lobby, OR Jo-Ann Fabrics, OR Walmart 

Size:
Adult
Upper leg measurement: 14" (stretches to 16", and holds OK on tights)
Length: approx. 26"
Newborn
Upper leg measurement: 7" (stretches to 8", and holds OK on tights)
Length: 6"

Materials:
1 ball of yarn that is lightweight #3; I used Lion Brand Yarns, Mandala, Unicorn color; 100% acrylic; 5.3 oz/150 g; 590 yds/540m (if you want to match up variegated colors, you will need 2 balls)
Hook size 5mm
Yarn needle
Scissors


Size:
Varies

Gauge:
4"x4" = 12 dc sts x 7 dc rows

Abbreviations:
ch - chain
dc - double crochet
hdc - half double crochet
sc - single crochet
fpdc - crochet dc through front post of dc from prev. row
bpdc - crochet dc through back post of dc from prev. row
join - join with a slip stitch

Step-by-Step

Make 2

Foundation (according to video) - ch50, join

Work on your "ribbing":
Rnd 1           ch3 (counts as dc), then 1 dc into next 49 consecutive ch sts, join (total 50 sts)
Rnd 2-10      ch2 (counts as dc), then *[1 fpdc, 1 bpdc]* - 24x; then 1 fpdc, join to ch2  (total 50 sts)

Work on your pattern:
Rnd 11         ch3, then 3 dc in the same base as ch3 (4dc-cluster), skip 4 sts, 4 dc in 5th ch st, *[skip 3 sts, 4 dc in 4th ch st]* - repeat 10x = until last 4 sts, skip these 4 sts, join into ch3 (total 12 "4dc-clusters")
(Note: if you will make foundation with multiples of 4, then you will always skip only 3 sts and make 4 dc in 4th st)
Rnd 12        ch2, *[skip 3 sts, 1 dc in 4th st, ch2, 1 dc in first skipped st]* - repeat 11x OR until you have 3 sts left - skip these 3 sts, make 1 dc into the base of ch2 in the beginning of the row, ch2, then 1 dc into first skipped st and join into 2 chain sts (in the spot where first dc and ch2 meet)

Note: from now on you will repeat Rnd 13 & 14 until your desired length
Rnd 13       slip stitch into ch2 space; then start your first cluster with ch3, then 3 dc in the same base as ch3 (4dc-cluster), *[skip 3 sts, 4 dc in 4th ch st]* - 11x; join (total 12 "4dc-clusters")
Rnd 14        ch2, *[skip 3 sts, 1 dc in 4th st, ch2, 1 dc in first skipped st]* - repeat 11x OR until you have 3 sts left - skip these 3 sts, make 1 dc into the base of ch2 in the beginning of the row, ch2, then 1 dc into first skipped st and join into 2 chain sts (in the spot where first dc and ch2 meet)

Repeat Rnd 13 & 15 as many times as needed.


Finishing:
After you finish your desired length, your last row should be the "criss-cross" row. To make the bottom flare out a little, first you will work your dc-cluster differently then finish with a tiny scalloped edge created by slip stitches, single crochet stitches and half double crochet stitches this way:

Rnd 1       slip stitch into ch2 space; then start your first cluster with ch3, then 4 dc in the same base as ch3 (5dc-cluster), *[skip 3 sts, 4 dc in 4th ch st, skip 3 sts, 4 dc in 4th ch st]* - alternate these 4- and 5-dc clusters to end; join (total 12 "dc-clusters")
Rnd 2       In 5-dc clusters make *[1 sc, 2 hdc, 1 sc, sl st]*; and in 4-dc clusters make *[1 sc, 1 hdc, 1 sc, sl st]* - alternate to end         


LEGWARMERS FOR A NEWBORN

Make 2

Foundation (according to video) - ch28, join

Work on your "ribbing":
Rnd 1           ch3 (counts as dc), then 1 dc into next 27 consecutive ch sts, join (total 28 sts)
Rnd 2-5      ch2 (counts as dc), then *[1 fpdc, 1 bpdc]* - 13x; then 1 fpdc, join to ch2  (total 28 sts)

Work on your pattern:
Rnd 6         ch3, then 3 dc in the same base as ch3 (4dc-cluster), *[skip 3 sts, 4 dc in 4th ch st]* - repeat 6x = until last 3 sts, skip these 3 sts, join into ch3 (total 7 "4dc-clusters")
(Note: if you will make foundation with multiples of 4, then you will always skip only 3 sts and make 4 dc in 4th st)
Rnd 7        ch2, *[skip 3 sts, 1 dc in 4th st, ch2, 1 dc in first skipped st]* - repeat 6x OR until you have 3 sts left - skip these 3 sts, make 1 dc into the base of ch2 in the beginning of the row, ch2, then 1 dc in first skipped st and join into 2 chain sts (in the spot where first dc and ch2 meet)

Note: from now on you will repeat Rnd 13 & 14 until your desired length
Rnd 8       slip stitch into ch2 space; then start your first cluster with ch3, then 3 dc in the same base as ch3 (4dc-cluster), *[skip 3 sts, 4 dc in 4th ch st]* - 6x; join (total 7 "4dc-clusters")
Rnd 9        ch2, *[skip 3 sts, 1 dc in 4th st, ch2, 1 dc in first skipped st]* - repeat 6x OR until you have 3 sts left - skip these 3 sts, make 1 dc into the base of ch2 in the beginning of the row, ch2, then 1 dc in first skipped st and join into 2 chain sts (in the spot where first dc and ch2 meet)

Repeat Rnd 8 & 9 as 2x (or as many times as needed).

Finishing:
After you finish your desired length, your last row should be the "criss-cross" row. To make the bottom flare out a little, first you will work your dc-cluster differently then finish with a tiny scalloped edge created by slip stitches, single crochet stitches and half double crochet stitches this way:

Rnd 1       slip stitch into ch2 space; then start your first cluster with ch3, then 4 dc in the same base as ch3 (5dc-cluster), *[skip 3 sts, 4 dc in 4th ch st, skip 3 sts, 4 dc in 4th ch st]* - alternate these 4- and 5-dc clusters to end (you will finish with 5-dc cluster); join (total 7 "dc-clusters") - weave in all ends.   


***

DID YOU FIND ERRORS? Let me know on what page of my blog, and in which row by clicking HERE, and I will fix it as soon as I get to it. You can PM me on my FB Page HERE as well. Txs!
Also if you haven't subscribed to my HandmadeRukodelky Channel, you can do it HERE. There are many videos to be seen, too.

*******************************************************************************


Copyright page - click HERE


PLEASE, COMMENT ON YOUTUBE BELOW MY VIDEOS, AND/OR SHARE YOUR IMAGES OF YOUR RECREATED WORKS ON MY FB PAGE HERE :-)


Note: Most of the time I work as fast as I can to keep up with knitting and crocheting requests. I have to videotape, edit videos, then convert them & upload them to my channel. After that often I post on my blog patterns. I answer many questions, which means that often I work up to 16 hours a day. I would tremendously appreciate IF anyone of you who finds an error in the written pattern, so please, let me know - where (what rows) and what may be the problem. Many future knitters & crocheters from our artsy and crafty virtual world will thank you for your good deed, including myself.

Crocheted Sixtopus


Rainbow Sixtopus  
Over the years while living in my area, I met few ladies from my birth country, which of course I keep in touch via Facebook. Occasionally, I share my knitted or crocheted items with my friends, but not too much because they do not knit or crochet. For that, I have a separate page on Facebook for people who are interested in these artful projects. One of my friends tagged me in a post recently where one Czech hospital is looking for crocheted Octopuses for prematurely born babies or newborns in intensive care. I did a research and found out that it started in Norway when someone gave a newborn a crocheted octopus toy into a bassinet and the baby started doing better. So nurses in this hospital started giving babies handmade octopuses and realized that all children with octopuses were doing better than children without them. The word spread out, and now many hospitals in EU are accepting donations of handmade octopuses, and one of the hospitals is in my country, where I will be traveling to in a couple of weeks. I will be bringing them some Sixtopuses.

Now, when I was doing a research on these octopuses, I've read someone's comment that US hospitals do not accept these handmade toyes because of babies being vulnerable infections. Supposedly crochet items cannot be adequately cleaned to remove the bacteria. And that made me think: "WHY NOT?" There are UV-C light machines that kill bacteria and diseases by attacking their DNA. And I am sure hospitals have such machines. These toys with tentacles help premature babies to stabilize their heart rate and breathing. So it would be beneficial for babies to have octopuses next to them.

HERE IS A LIST OF HOSPITALS THAT ACCEPT OCTOPUSES

If you are a visual crocheter you can see Sixtopus video for righties HERE and video for lefties HERE. A free written pattern is below. Make a sixtopus for someone's newborn and make them happy - their baby does not have to be prematurely born to sleep with your Sixtopus :-) Do not forget to wash your sixtopus before you give it away to a tiny healthy newborn.

Sixtopus from my YouTube instructional video

Materials (if you shop on-line via my affiliated links below, I would get few pennies, which would help to fund my future projects TXS):
Michaels on line store, OR Hobby Lobby, OR Jo-Ann Fabrics, OR Walmart 

Yarn: leftovers of Loops & Thread, Snuggly Wuggly, light weight #3 yarn, your choice of colors  (these yarns were used in making of the video)
For "Rainbow Sixtopus" (pictured above) I used yarn by Premier, Cotton Fair; 52% Cotton/48% Acrylic; use your choice of colors
Hook - US size E,  3.50 mm
Scissors
Sewing/yarn needle for weaving your ends in

Size:
Length of the sixtopus is ~7" (about 17.50 cm)

Abbreviations:
ch - chain
sc - single crochet
pm - place marker
st(s) - stitch(es)
dc - double crochet
sc2tog - single crochet 2 stitches together (if possible do it invisible way - see my video)


Step-by-Step:

HEAD/BODY:

color #1

Foundation: magic circle

Rnd 1              6 sc into magic circle, connect into circle with sl. st
Rnd 2              *(2 sc in each st )* - 6x; work in a spiral manner, pm (total 12 sts)
Rnd 3              *(1 sc in 1st sts, 2 sc into next st)* - 6x; (total 18 sts), pm
Rnd 4              *(2 sc in 1st stitch, 1 sc in each of next two sts)* - 6x; (total 24 sts), pm
Rnd 5-9          1 sc in each of next 24 sts, pm
Row 10           *(1 sc in each of next two sts, sc2tog)* - 6x; (total 18 sts), pm
Row 11-12      1 sc in each of next 18 sts, pm
Row 13           *(sc2tog, 1 sc in each of next st)* - 6x; (total 12 sts), pm
Row 14-16     1 sc in each of next 12 sts, pm

Finish this with 2 slip stitches to slope down the row. Stuff the head with your preferred toy filling.

PLUG:

Crochet a circle (a plug) to close the head/body part.

Rnd 1              6 sc into magic circle, connect into circle with sl. st
Rnd 2              *(2 sc in each st )* - 6x; work in a spiral manner (total 12 sts)

Do not cut off the yarn. Place the circle (plug) over the opening of the stuffed Head/Body and crochet them together with slip stitches (see my video).

TENTACLES:

Tentacle 1            Either continue with same yarn or start a foundation of 30+ chain stitches with a different color; then on the "way back" toward the head work as such: make 3 dc into 4th st from the hook, *(make 3 dc into each st)* - repeat to end, then slip st into the second st of the circle

Tentacle 2-6        ch30+, 3 dc into 4th st from the hook, *(make 3 dc into each st)* - repeat to end, then slip st into the second st of the circle
Note: you can watch my video - link is above - how to crochet these tentacles

When finished weave in all the ends.


***

DID YOU FIND ERRORS? Let me know on what page of my blog, and in which row by clicking HERE, and I will fix it as soon as I get to it. You can PM me on my FB Page HERE as well. Txs!
Also if you haven't subscribed to my HandmadeRukodelky Channel, you can do it HERE. There are many videos to be seen, too.

*******************************************************************************


Copyright page - click HERE


PLEASE, COMMENT ON YOUTUBE BELOW MY VIDEOS, AND/OR SHARE YOUR IMAGES OF YOUR RECREATED WORKS ON MY FB PAGE HERE :-)


Note: Most of the time I work as fast as I can to keep up with knitting and crocheting requests. I have to videotape, edit videos, then convert them & upload them to my channel. After that often I post on my blog patterns. I answer many questions, which means that often I work up to 16 hours a day. I would tremendously appreciate IF anyone of you who finds an error in the written pattern, so please, let me know - where (what rows) and what may be the problem. Many future knitters & crocheters from our artsy and crafty virtual world will thank you for your good deed, including myself.

Shaken Baby Syndrome Purple Hat

Knitted "Shaken Baby Syndrome Purple Hats"  
One of my virtual knit/crochet friends shared with several of us, knitters, a link (see below) about donating purple hats for Shaken Baby Syndrome (SBS). Furthermore, I found an article that talks about the science behind SBS - click HERE if you'd like to read it. It's quite a fascinating read about what happens to a shaken baby, supplied with images.
The color of the hat is purple because it represents the abbreviation for "period of P.U.R.P.L.E. crying."
Click HERE for another article about SBS (on the Mayo Clinic web page) that talks about this issue - print it for new parents to read. Spread the word. Help them be educated even before their baby is born.
Watch THIS  EXCELLENT VIDEO to understand this crying period, which is explained by Dr. Ron Barr, a world expert on infant crying.
THIS VIDEO explains more about SBS and how to prevent it.


Articles, videos, and P.U.R.P.L.E. hats could help parents to prepare for this difficult time, especially new parents whose babies are more vulnerable. Some children never cry, some cry a little, some cry a lot. And parents of infants that cry a lot will have to train themselves to have a lot of patience.
The purple hat, if worn by a child, could remind parents to stay "calm" when frustrated, and find ways how to deal with the situation. If you know of any new parents, share the links above with them and knit a purple hat as a gift.

I decided to knit few hats for the cause mentioned above. See a couple of links below for places that need P.U.R.P.L.E. hats. I hear that hats should be preferably unisex, from relatively soft yarn (not to scratch babies' skin), hats must fit newborn babies, and they should be minimum 50% purple.

For visual knitters, I made a video of a simple hat (for my right-handed video click HERE and if you are a left-handed knitter click HERE) so if you prefer knitting along click on these links. I made three hats using three different yarns: a sports yarn (#3 - light weight) for babies, and two types of worsted yarn (#4 - medium weight). All same unisex style to be worn by a boy or a girl.

Places where hats are needed at this time (August 2017) as I write this post:


Abbreviations:
CO - cast on
K - knit
P - purl
DPN - double pointed needles
K2tog - knit 2 stitches together
BO - bind off

Gauge:
My gauge corresponds to a manufacturer's gauge on any yarn label


PATTERN #1 FOR 

Both hats were knitted with same knitting needles

Hat #1 & Hat #2 


Purple Hat #1 from Snuggly Wuggly yarn (Sof Lilac color)

Hat #2 from Shawl in a Ball yarn (Mindful Mauve color - use purple part)

Materials (if you shop online via my affiliated links below, I would get few pennies, which would help to fund my future projects TXS):
Michaels online store, OR Hobby Lobby, OR Jo-Ann Fabrics, OR Walmart 

Yarn for Hat #1: about 1/4 ball of Loops & Threads, Snuggly Wuggly; color Soft Lilac; 100% acrylic; 5 oz/141 g; 446yrds/408 m

Yarn for Hat #2: the purple part of Lion Brand; Shawl in a Ball; color: Mindful Mauve; 58% cotton/39% acrylic; 3 % other fiber; 5.3 oz/150 g; 518 yd/473 m; Note: I made 2 hats from one purple part of the yarn; this yarn is surprisingly soft to the touch

Double Pointed Needles or circular needles - size #5 (3.75mm), and #6 (4mm)
Hook - size #D
Yarn Needle (for weaving in the tail)
Scissors

Size:
Circumference: 13"-14"
Height: 6" (without the antennae)


Step-by-Step:

CO 70 sts on #5 (3.75 mm) long (or circular) needles and knit ribbing

Row 1              *(K1, P1)* - repeat to end (35x); then distribute stitches evenly among 3 DPNs (24-24-22 sts on each needle), connect into circle (make sure stitches are not twisted)
Rnd 2-14         *(K1, P1)* - repeat 35x in each row

Note: Switch to #6 (4 mm) knitting needles and finish knitting the entire hat with this size

Rnd 15-28       K70

Decreasing for top:

Round 29          *[K8, K2tog]* - 7x
Round 30          K63
Round 31          *[K7, K2tog]* - 7x
Round 32           K56
Round 33          *[K6, K2tog]* - 7x; (total 49 sts)
Round 34          *[K5, K2tog]* - 7x; (total 42 sts)
Round 35          *[K4, K2tog]* - 7x; (total 35 sts)
Round 36          *[K3, K2tog]* - 7x; (total 28 sts)
Round 37          *[K2, K2tog]* - 7x; (total 21 sts)
Round 38          *[K1, K2tog]* - 7x; (total 14 sts)
Round 39          *[K5, K2tog]* - 2x; (total 12 sts)
Round 40          *[K4, K2tog]* - 2x; (total 10 sts)
Round 41          *[K3, K2tog]* - 2x; (total 8 sts)
Round 42          *[K2, K2tog]* - 2x; (total 6 sts)
Round 43-?       K6 in each row until your tube measures about 4 inches.

BO by pulling yarn through all stitches, weave in the ends. Tie the knot and give it to some one.


PATTERN #2 

Materials For Hat #3


Purple hat #3 - from Caron Cakes (Bumbleberry color)


Caron Cakes worsted yarn #4; Bumbleberry (purple variegated) color; 80% acrylic/20% wool; 7.1 oz/200g; 383 yd/350 m
Double Pointed Needles or circular needles - size #8 (5mm)
Hook - size #F
Yarn Needle (for weaving in the tail)
Scissors

Size:
Circumference: 13"-14"
Height: 5" (without the antennae)


Step-by-Step:

CO 60 sts on long (or circular) needles (5mm)

Row 1              *(K1, P1)* - repeat to end; then distribute stitches evenly among 3 DPNs (20-20-20 sts on each needle), connect into circle (make sure stitches are not twisted)
Rnd 2-12         *(K1, P1)* - repeat 30x in each row
Rnd 13-24       K60

Decreasing for top:

Round 25          *[K8, K2tog]* - 6x
Round 26          K54
Round 27          *[K7, K2tog]* - 6x
Round 28          *[K6, K2tog]* - 6x; (total 42 sts)
Round 29          *[K5, K2tog]* - 6x; (total 36 sts)
Round 30          *[K4, K2tog]* - 6x; (total 30 sts)
Round 31          *[K3, K2tog]* - 6x; (total 24 sts)
Round 32          *[K2, K2tog]* - 6x; (total 18 sts)
Round 33          *[K1, K2tog]* - 6x; (total 12 sts)
Round 34          K12
Round 35          K2tog - 6x; (total 6 sts)
Round 36-?       K6 in each row until your tube measures about 4 inches.

BO by pulling yarn through all stitches, weave in the ends. Tie the knot and give it to some one.


***

DID YOU FIND ERRORS? Let me know on what page of my blog, and in which row by clicking HERE, and I will fix it as soon as I get to it. You can PM me on my FB Page HERE as well. Txs!
Also if you haven't subscribed to my HandmadeRukodelky Channel, you can do it HERE. There are many videos to be seen, too.

*******************************************************************************


Copyright page - click HERE


PLEASE, COMMENT ON YOUTUBE BELOW MY VIDEOS, AND/OR SHARE YOUR IMAGES OF YOUR RECREATED WORKS ON MY FB PAGE HERE :-)


Note: Most of the time I work as fast as I can to keep up with knitting and crocheting requests. I have to videotape, edit videos, then convert them & upload them to my channel. After that often I post on my blog patterns. I answer many questions, which means that often I work up to 16 hours a day. I would tremendously appreciate IF anyone of you who finds an error in the written pattern, so please, let me know - where (what rows) and what may be the problem. Many future knitters & crocheters from our artsy and crafty virtual world will thank you for your good deed, including myself.