Search This Blog and The Web

Showing posts with label Valentines. Show all posts

Little Hats Big Hearts Project - Red Hat 4 Newborns


UPDATE:
PLEASE BE AWARE THAT AMERICAN HEART ASSOCIATION DOESN'T ACCEPT THESE HATS ANYMORE. INSTEAD, THEY ACCEPT FINANCIAL DONATIONS AND/OR VOLUNTEER HELP. YOU CAN KNIT THESE AS A VALENTINE'S GIFT. ❤️❤️❤️

A couple of months ago, my friend (fabulous and talented Iris) shared a link to the "LITTLE HATS BIG HEARTS" project with me. In it, the AMERICAN HEART ASSOCIATION asked knitters and crocheters in the US to make red hats for NEWBORN BABIES to raise awareness for "Congenital Heart Defects."
The requested specifics are that yarn needs to be: red, cotton, or acrylic, medium to heavyweight, and machine washable and dryable.
I got excited about this project and decided not only to make these hats, but also to write two patterns for my followers (one for hat knitted in the round, and one for hat knitted on straight knitting needles), and make three videos of hats - one knitted with DPNs, one knitted with circulars and one knitted on straight needles. And on top of that, these three videos for right-handed edit also for left-handed knitters (total six videos).
Although I am not very strong in the English style of knitting, I included a few times both versions - the Continental style of knitting and English too.

For the two hats knitted either with DPNs or circular needles, you need to know how to knit in the round. The hat knitted on straight needles is more comfortable to knit, but then you have to deal with a seam. However, all you need to know, to knit these hats, is how to cast on, how to knit and purl, how to bind off, and for hat knitted flat also how to sew or crochet the two side seams together.

I know it is already February, and hospitals may not accept hats anymore (please check either with your local hospital OR with American Heart Association if they are still accepting hats in your area). However, you could make a newborn hat with hearts for Valentine's baby, or for your family member or a friend that will be Mom soon.

This hat is not only great for spreading awareness about "Congenital Heart Defects," but also just for giving a hat with heart - also a meaning for LOVE. And while you are reading this, please, check out my "SHAKEN BABY SYNDROME PURPLE HAT" post - which I wrote a while back about another so much needed awareness. There is a free written pattern, plus links to videos for right-handed and left-handed knitters. Spread the love, and spread the wisdom you learn from reading educational articles online (click on the provided links throughout this article).

Thank you all.

BELOW ARE LINKS FOR THE SIX VIDEOS - FOR RIGHTIES AND LEFTIES: 

CLICK HERE FOR HAT #1 KNITTED ON DPNs FOR RIGHTIES
CLICK HERE FOR HAT #1 KNITTED ON DPNs FOR LEFTIES

CLICK HERE FOR HAT #2 KNITTED ON CIRCULARS FOR RIGHTIES
CLICK HERE FOR HAT #2 KNITTED ON CIRCULARS FOR LEFTIES
In these two videos, you will see a good demonstration of using a so-called "magic loop" while knitting with circular needles.

CLICK HERE FOR HAT #3 KNITTED ON STRAIGHT NEEDLES FOR RIGHTIES
CLICK HERE FOR HAT #3 KNITTED ON STRAIGHT NEEDLES FOR LEFTIES


Abbreviations:
CO - cast on
DPN - double pointed needles
K - knit
P - purl
M - marker
K2tog - knit 2 stitches together
BO - bind off by pulling yarn through remaining sts
sl sts - slip stitches

Gauge:
My gauge corresponds to a manufacturer's gauge on any yarn label

Materials (if you shop online via my affiliated links below, I would get few pennies, which would help to fund my future projects TXS):
Michaels online store, OR Hobby Lobby, OR Jo-Ann Fabrics, OR Walmart 
Yarn - any washable red, acrylic, medium weight (#4, worsted) - see below which ones I used
Knitting needles - all these hats were knitted on same sized needles: US #7 (4.5mm)
Hook - I used 4mm hook
Yarn Needle (for weaving in the tail, optional)
Scissors

Size:
Circumference: 12"-13"
Height: 5"


HAT #1 - KNITTED ON DPNs - about 1/4 ball of yarn by Loops & Threads, Impeccable; medium worsted #4; color Cherry; 100% acrylic
&
HAT #2 - KNITTED ON CIRCULARS - about 1/4 ball of yarn by Red Heart, Super Saver; medium worsted #4; color Hot Red; 100% acrylic

HAT #1

HAT #2


Step-by-Step:

CO 54 sts on long needles (4.5 mm)

Row 1              knit the first row of ribbing as such: *(K1, P1)* - repeat to end; then distribute stitches evenly among 3 DPNs (18-18-18 sts on each needle), OR move your sts onto your circular knitting needles; then join into circle (make sure stitches are not twisted when joining)
Rnd 2-8           *(K1, P1)* - repeat 27x in each row
Rnd 9-11          K54, in 11th round place M every 9 sts
Rnd 12-13        *[K4, P1, K4]* - 6x
Rnd 14-15        *[K3, P3, K3]* - 6x
Rnd 16-17        *[K2, P5, K2]* - 6x
Rnd 18-19        *[K1, P7, K1]* - 6x
Rnd 20-21        *[K1, P3, K1, P3, K1]* - 6x
Rnd 22             *[K2, P1, K3, P1, K2]* - 6x
Rnd 23-26         K54 - remove your M
Rnd 27              *[K4, K2tog]* - 9x
Rnd 28              K45
Rnd 29              *[K3, K2tog]* - 9x
Rnd 30              K36
Rnd 31              *[K2, K2tog]* - 9x
Rnd 32              K27
Rnd 33              *[K1, K2tog]* - 9x

You will have 18 sts left on your needles - elongate your last knitted stitch by pulling it and pull it through remaining stitches with a hook. Make a knot, and weave in your tails on the inside of your hat.


HAT #3 - KNITTED ON STRAIGHT KNITTING NEEDLES - about 1/4 ball of yarn by Caron, Simply Soft; medium worsted #4; color Autumn Red; 100% acrylic

HAT #3


Step-by-Step:

CO 54 sts on long needles (4.5 mm)

Row 1-8           *(K1, P1)* - repeat 27x in each row
Rnd 9               K54
Rnd 10             P 54
Rnd 11             K54
Rnd 12             P 54
Rnd 13            *[K4, P1, K4]* - 6x
Rnd 14            *[P4, K1, P4]* - 6x
Rnd 15            *[K3, P3, K3]* - 6x
Rnd 16            *[P3, K3, P3]* - 6x
Rnd 17            *[K2, P5, K2]* - 6x
Rnd 18            *[P2, K5, P2]* - 6x
Rnd 19            *[K1, P7, K1]* - 6x
Rnd 20            *[P1, K7, P1]* - 6x
Rnd 21            *[K1, P3, K1, P3, K1]* - 6x
Rnd 22            *[P1, K3, P1, K3, P1]* - 6x
Rnd 23             *[K2, P1, K3, P1, K2]* - 6x
Rnd 24             P 54 - remove your M
Rnd 25             K54
Rnd 26             P 54
Rnd 27             *[K4, K2tog]* - 9x
Rnd 28             P45
Rnd 29             *[K3, K2tog]* - 9x
Rnd 30             P36
Rnd 31             *[K2, K2tog]* - 9x
Rnd 32             P27
Rnd 33             *[K1, K2tog]* - 9x

You will have 18 sts left on your needles - elongate your last knitted stitch by pulling it and insert it through the remaining stitches with a hook. Make a knot, sew or crochet your sides together and weave in your tails on the inside of your hat. If you will crochet your sides (see the video knitting with straight needles) use sl sts - do not crochet with single crochet stitches, it would be too thick.
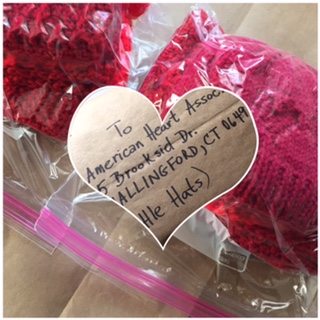
Donated hats - thank you Iris for the idea and hats!


***

DID YOU FIND ERRORS? Let me know on what page of my blog, and in which row by clicking HERE, and I will fix it as soon as I get to it. You can PM me on my FB Page HERE as well. Txs!
Also if you haven't subscribed to my HandmadeRukodelky Channel, you can do it HERE. There are many videos to be seen, too.

*******************************************************************************


Copyright page - click HERE


PLEASE, COMMENT ON YOUTUBE BELOW MY VIDEOS, AND/OR SHARE YOUR IMAGES OF YOUR RECREATED WORKS ON MY FB PAGE HERE :-)


Note: Most of the time I work as fast as I can to keep up with knitting and crocheting requests. I have to videotape, edit videos, then convert them & upload them to my channel. After that often I post on my blog patterns. I answer many questions, which means that often I work up to 16 hours a day. I would tremendously appreciate IF anyone of you who finds an error in the written pattern, so please, let me know - where (what rows) and what may be the problem. Many future knitters & crocheters from our artsy and crafty virtual world will thank you for your good deed, including myself.

Red Black Furry Shrug

A shrug or a scarf, or even a hat (can be seen in my video)
Not too long ago I treated myself to a very furry Italian yarn. It was on sale, so I splurged.

This Jaeger yarn is made up of an equal combination of wool and kid mohair with a polyamide thread holding these precious "eyelash like" strands together. Although, one has to be careful while knitting each stitch because those short wooly pieces woven into polyamide threads can be deceiving. However, this yarn knits quick. You can have a shrug, or a scarf, in one or two days. That is if you knit with a very bulky yarn. If you decide to use a less bulky yarn, you will have to alter the pattern written below. You can use my graph (also below) to do mathematical calculations of your stitches and rows. Also, keep in mind that your knitting may take a bit longer. Also, you could do few more increases and consequently also decreases for a longer back.

And of course, I have videos to go with this pattern as well. If you are a right-handed knitter, click HERE; and if you are a left-handed knitter, click HERE.

Of course, since I most of the time I have to work as fast as I can, to keep up with the requests, I would appreciate if any of you find a mistake in the written pattern, please, to let me know - where (what rows) and what is the problem. Many future knitters & crocheters from our artsy and crafty virtual world will thank you for your good deed.


Materials:
  • 2 balls of Jaeger "FUR" Yarn 47% Wool, 47% Kid Mohair, 6% Polyamide; 22 yds (20 m); 1.75 oz (50 gr), color "Red"
  • 5 balls of Jaeger "FUR" Yarn 47% Wool, 47% Kid Mohair, 6% Polyamide; 22 yds (20 m); 1.75 oz (50 gr), color "Black"
  • Knitting needles US #15 (10mm) - pattern calls for double pointed, but you can use circular needles instead
  • Scissors
  • yarn needle (for thin yarn) to perform Kitchener stitch 

Gouge (stockinette stitch):

1"x1" = approximately 2 sts x 2.25 rows


Abbreviation:

CO - cast on
K - knit
P - purl
m1 - make 1 st into the stitch below the next stitch (then continue knitting next st in the regular manner)
K2tog - knit two together

st(s) - stitch(es)

The graph for knitting shrug sideways - from sleeve to sleeve


Step-by-Step Directions
:

Foundation: CO 20 stitches

RED COLOR YARN

Row 1-6          K20

Row 7             K20
Row 8             P20

Repeat Rows 7 & 8 seven more times (total 16 rows, including Rows 7 & 8)

BLACK COLOR YARN

Row 23          K20
Row 24          P20

Repeat Rows 23 & 24 - fourteen more times (total 30 rows, including Rows 23 & 24)

Row 53          K1, m1, K18, m1, K1 - PM in this row (total 22 sts)
Row 54          P22
Row 55          K22
Row 56          P22
Row 57          K22
Row 58          P22

Row 59          K1, m1, K20, m1, K1 - PM in this row (total 24 sts)
Row 60          P24
Row 61          K24
Row 62          P24
Row 63          K24
Row 64          P24

Row 65          K1, m1, K22, m1, K1 - PM in this row (total 26 sts)
Row 66          P26

Row 67          K26
Row 68          P26

Repeat Rows 67 & 68 - sixteen more times (total 36 rows, counting from Row 65)

Row 101        K1, K2tog, K20, K2tog, K1 - PM in this row (total 24 sts)
Row 102        P24
Row 103        K24
Row 104        P24
Row 105        K24
Row 106        P24

Row 107        K1, K2tog, K18, K2tog, K1 - PM in this row (total 22 sts)
Row 108        P22
Row 109        K22
Row 110        P22
Row 111        K22
Row 112        P22

Row 113        K1, K2tog, K16, K2tog, K1 - PM in this row (total 220 sts)
Row 114        P20

Row 115        K20
Row 116        P20

Repeat Rows 115 & 116 twelve more times (total 30 rows, counting from Row 113)

RED COLOR YARN

Row 143        K20
Row 144        P20

Repeat Row 143 & 144 seven more times (total 16 rows, including Rows 143 & 144)

Row 159-164 K20
Row 165        BO all sts

Fold your knit lengthwise in half and sew the sleeves along the side to the second marker from each end of the sleeve - leaving back part open. Weave in all the tails.


***

DID YOU FIND ERRORS? Let me know on what page of my blog, and in which row by clicking HERE, and I will fix it as soon as I get to it. You can PM me on my FB Page HERE as well. Txs!
Also if you haven't subscribed to my HandmadeRukodelky Channel, you can do it HERE. There are many videos to be seen, too.

*******************************************************************************


Copyright page - click HERE


PLEASE, COMMENT ON YOUTUBE BELOW MY VIDEOS, AND/OR SHARE YOUR IMAGES OF YOUR RECREATED WORKS ON MY FB PAGE HERE :-)


Note: Most of the time I work as fast as I can to keep up with knitting and crocheting requests. I have to videotape, edit videos, then convert them & upload them to my channel. After that often I post on my blog patterns. I answer many questions, which means that often I work up to 16 hours a day. I would tremendously appreciate IF anyone of you who finds an error in the written pattern, so please, let me know - where (what rows) and what may be the problem. Many future knitters & crocheters from our artsy and crafty virtual world will thank you for your good deed, including myself.

Knitted Heart Placemat

I knitted a small placemat for my coffee break in the shape of a heart. The heart was knitted sideways and in the end I crocheted a backstitch (single crochet) around the entire heart. Each row is knitted differently and that is why it requires a lot of concentration and patience. I knitted the heart with a seed stitch.

BTW:
If you visit my sponsor and if you sign up, you will get cash back savings, promo codes, deals and coupons when you shop online. Which will also help me FUND my yarn, tools, software and other materials that are needed to make FREE PATTERNS AND VIDEOS for you. Txs.

2015-01-24
The rows 21 & 25 were corrected. Big thanks to Mrs. Wiltse and her friend who found the errors. 


Materials used:
Yarn: Loops & Threads, Charisma, Red color #5 thickness
Needles size US #10.5 (6.5 mm)
Hook #F
Scissors

Size:
width: 12"
height: 10"

Gauge:
4"x4" = 10 sts x 15 rows 

Abbreviations:

CO - cast on
K - knit
P - purl
Kbf - increase by knitting first in back loop, then in front loop of the stitch
KFB - increase by knitting first in front loop, then in the back loop of the stitch
st(s) - stitch(es)
K2tog - knit two stitches together
P2tog - purl two stitches toghether
BO - bind off


Step-by-Step Instructions:

CO 7 sts

Row 1          *[K1, P1]* - repeat from * to *, K last st
Row 2          Kbf, P1, K1, P1, K1,  Kbf, Kbf
Row 3          Kbf, *[P1, K1]* - repeat from * to *, KFB
Row 4          Kbf, *[P1, K1]* - repeat from * to *, KFB
Row 5          Kbf, *[P1, K1]* - repeat from * to *, KFB
Row 6          Kbf, *[P1, K1]* - repeat from * to *, P last st
Row 7          KFB, *[K1, P1]* - repeat from * to *, KFB
Row 8          Kbf, *[K1, P1]* - repeat from * to *, K last st
Pow 9          *[K1, P1]* - repeat from * to *, K last st
Row 10        Kbf, *[P1, K1]* - repeat from * to *, until last 2 sts, then P1, KFB
Row 11        K1, *[K1, P1]*  - repeat from * to *
Row 12        K1, *[K1, P1]*  - repeat from * to *
Row 13        K1, *[K1, P1]*  - repeat from * to *, until last 2 sts - then K1, KFB
Row 14        *[K1, P1]* - repeat from * to *, K last st
Row 15        K1, *[K1, P1]*  - repeat from * to *, K last st
Row 16        Kbf, *[P1, K1]* - repeat from * to *, P last st
Row 17        K1, *[K1, P1]*  - repeat from * to *
Row 18        Kbf, *[K1, P1]* - repeat from * to *
Row 19        K1, *[K1, P1]*  - repeat from * to * until last st, then KFB
Row 20        K1, *[K1, P1]*  - repeat from * to *
Row 21        K1, *[K1, P1]*  - repeat from * to * until last 2 sts, then K1, KFB
Row 22        *[K1, P1]*  - repeat from * to *
Row 23        K1, *[K1, P1]*  - repeat from * to * until last st, then KFB
Row 24        K1, *[K1, P1]*  - repeat from * to * until last 2 sts, then K2tog
Row 25        *[K1, P1]*  - repeat from * to * until last 2 sts, then K1, KFB
Row 26        *[K1, P1]*  - repeat from * to * until last st, then K1
Row 27        K2tog, *[K1, P1]*  - repeat from * to * until last st, then KFB
Row 28        KFB, *[K1, P1]*  - repeat from * to *
Row 29        K2 tog, *[P1, K1]* - repeat from * to *, until last 2 sts, then P1, KFB
Row 30        KFB, *[K1, P1]* - repeat from * to *, until last 3 sts, then K1, P2tog
Row 31        K2 tog, *[P1, K1]* - repeat from * to *, until last 2 sts, then P1, KFB
Row 32        K1, *[K1, P1]*  - repeat from * to * until last st, then K last st
Row 33        Kbf, *[P1, K1]* - repeat from * to * until last 3 sts, then P1,  K2tog
Row 34        K2tog, *[K1, P1]* - repeat from * to * until last 2 sts, then K1, KFB
Row 35        Kbf, *[P1, K1]* - repeat from * to * until last 3 sts, then P1, K2tog
Row 36        K2tog, *[K1, P1]* - repeat from * to *
Row 37        Kbf, *[K1, P1]* - repeat from * to * until last 2 sts, then K2tog
Row 38        *[K1, P1]*  - repeat from * to * until last st, then K1
Row 39        *[K1, P1]*  - repeat from * to * until last 3 sts, then K1, P2tog
Row 40        K1, *[K1, P1]*  - repeat from * to * until last st, then KFB
Row 41        K1, *[K1, P1]*  - repeat from * to * until last 2 sts, then K2tog
Row 42        *[K1, P1]*  - repeat from * to *
Row 43        K1, *[K1, P1]*  - repeat from * to * until last 3 sts, then K1, P2tog
Row 44        K1, *[K1, P1]*  - repeat from * to *
Row 45        K1, *[K1, P1]*  - repeat from * to * until last 2 sts, then K2tog
Row 46        *[K1, P1]*  - repeat from * to *
Row 47        K1, *[K1, P1]*  - repeat from * to *, then K last st
Row 48        K2tog, *[K1, P1]*
Row 49        K1, *[K1, P1]*  - repeat from * to *
Row 50        K1, *[K1, P1]*  - repeat from * to *
Row 51        K1, *[K1, P1]*  - repeat from * to * until last 2 sts, then K2tog
Row 52        *[K1, P1]*  - repeat from * to *
Row 53        K1, *[K1, P1]*  - repeat from * to *, then K last st
Row 54        K2tog, *[K1, P1]*  - repeat from * to * until last 2 sts, then K2tog
Row 55        *[K1, P1]*  - repeat from * to *
Row 56        K2 tog, *[P1, K1]* - repeat from * to *
Row 57        K2 tog, *[K1, P1]* - repeat from * to *, then K last st
Row 58        K2 tog, *[K1, P1]* - repeat from * to *
Row 59        K2 tog, *[P1, K1]* - repeat from * to *, until last 3 sts, then P1, K2tog
Row 60        K2 tog, *[K1, P1]* - repeat from * to *, until last 3 sts, then K1, P2tog
Row 61        K2 tog, K2tog,  *[P1, K1]* - repeat from * to *, till last 3 sts, then P1, K2tog
Row 62        K2 tog, *[K1, P1]* - repeat from * to *, until last 2 sts, then K2tog
Row 63        BO remaining sts. Do not cut off yarn. Than use a hook to crochet reversed single crochet sts around entire perimeter of your heart.

2015-01-24
The rows 21 & 25 were corrected. Big thanks to Mrs. Wiltse and her friend who found the errors.


***

DID YOU FIND ERRORS? Let me know on what page of my blog, and in which row by clicking HERE, and I will fix it as soon as I get to it. You can PM me on my FB Page HERE as well. Txs!
Also if you haven't subscribed to my HandmadeRukodelky Channel, you can do it HERE. There are many videos to be seen, too.

*******************************************************************************


Copyright page - click HERE


PLEASE, COMMENT ON YOUTUBE BELOW MY VIDEOS, AND/OR SHARE YOUR IMAGES OF YOUR RECREATED WORKS ON MY FB PAGE HERE :-)


Note: Most of the time I work as fast as I can to keep up with knitting and crocheting requests. I have to videotape, edit videos, then convert them & upload them to my channel. After that often I post on my blog patterns. I answer many questions, which means that often I work up to 16 hours a day. I would tremendously appreciate IF anyone of you who finds an error in the written pattern, so please, let me know - where (what rows) and what may be the problem. Many future knitters & crocheters from our artsy and crafty virtual world will thank you for your good deed, including myself.

Crocheted Heart And Flower Necklace - Video Tutorial and Give-A-Way #2

Are you thinking what gift you would like to give to your loved one on Valentine's Day? Do you know how to crochet? Do you know how to crochet these stitches - a slip stitch, single crochet, double crochet, treble crochet, and chain?
Then perhaps you would consider making a crocheted necklace (picture on your left) from a red yarn. You will need about 1/2 skein of your favorite yarn, hook, and scissors. Thin yarn will make this necklace more dainty, the thick yarn will make it more like a "necklace-y" scarf. So do not worry about picking up your preferred yarn and making your necklace your own.

I made a video "how-to crochet a necklace pictured on the left"  HERE.

Happy Valentines to you all.


***

DID YOU FIND ERRORS? Let me know on what page of my blog, and in which row by clicking HERE, and I will fix it as soon as I get to it. You can PM me on my FB Page HERE as well. Txs!
Also if you haven't subscribed to my HandmadeRukodelky Channel, you can do it HERE. There are many videos to be seen, too.

*******************************************************************************


Copyright page - click HERE


PLEASE, COMMENT ON YOUTUBE BELOW MY VIDEOS, AND/OR SHARE YOUR IMAGES OF YOUR RECREATED WORKS ON MY FB PAGE HERE :-)


Note: Most of the time I work as fast as I can to keep up with knitting and crocheting requests. I have to videotape, edit videos, then convert them & upload them to my channel. After that often I post on my blog patterns. I answer many questions, which means that often I work up to 16 hours a day. I would tremendously appreciate IF anyone of you who finds an error in the written pattern, so please, let me know - where (what rows) and what may be the problem. Many future knitters & crocheters from our artsy and crafty virtual world will thank you for your good deed, including myself.

A Very Simple Hat For Beginners

I decided to make several scarfs and hats for economically deprived people, which I will donate to a local organization in my area right before winter holidays.

On the left is my new hat which goes pattern-wise with my Very Simple Scarf For Beginners.

Bellow is a free pattern, but if you would prefer having this pattern in .pdf file (with several images) then you can visit my page on Ravelry for an easy download.


Material:
  • yarn – any worsted (medium) – I used Red Heart for this project, but it would look nicer if knitted with a wool. I am not sure how much yarn I used as I was working from a big skein, but you may need more then 50g
  • #5 circular needles (or 5 double pointed needles)
  • hook #E
  • scissors

Abbreviations:

  • CO – cast on 
  • st(s) – stitche(s) 
  • K – knit 
  • P – purl 
  • K2tog – knit 2 stitches together 
  • P2tog – purl 2 stitches together 
  • BO – bind off 


Size: 

  • diameter – 21 in (79 sts) 
  • height – 8 in (66 rows) 


Step-by-step instructions:

Row 1               CO 79 sts
Row 2              *[K, P] entire row – connect into a circle
Row 3 – 60      *[P, K] continually for 60 rows
Row 61 – 65    *[K2tog, P2tog] continually for 5 rows

In the 66th row (when you have about 6 or 7 stitches) pull one stitch through all the remaining stitches with the hook to BO. Then continue crocheting chain of 30 stitches. Cut up 5 ½ - 6 in long strings of yarn for the tassel (your choice – I cut up 30 pieces, but 20 pieces would be sufficient too), fold them in half while tying all the pieces to the crocheted string, and making a tassel. Clean up all the loose ends and even out all the pieces on the tassel with scissors.

The pattern for a similar scarf (above) can be found on THIS page of my HandMade-Rukodelky blog.


Knitted Pants and Blouse For A Doll >>> Pletene Kalhoty a Halenka Pro Panenku

Knitting for a doll is fun. Especially if your daughter(s) loves (love) to play a "fashion show".

A Valentine's Day outfit for American Girl Doll can be yours either as a pattern or as a knitted product. These pants and blouse with hearts hearts designs are made from an acrylic yarn. The blouse buttons with round buttons on shoulders, however if you order the knitted product buttons may vary.

If you are interested in ordering knitted Valentine's Set it  would be made to order, and therefore it would take a couple of days before it would be finished. If time is important you need to check with me how soon it would be shipped.

For shipping items I use USPS. All sales are final, so make sure you like the item.

These patterns ($3.00 each) are for sale on Ravelry (see below) and Etsy (see link in the menu) or via PayPal (below). The actual knitted blouse and pants can be purchased via PayPal on my blog ONLY (see options below).

  • If you do not belong to Ravelry crowd, see your options for purchase via PayPal - clicking on the drop down menu below.
    As soon as I receive the payment you will receive the .pdf file(s).


Choose Your Item

  • Ravelry knitters
Click below to purchase this pattern for Knitted Pants For Doll for $3.00


Click below to purchase this pattern for Knitted Blouse For Doll for $3.00


The patterns are available on ravelry.com now (see links above or visit ravelry.com and look me up under HandmadeRukodelky) or you can send me a message via this blog. Be assured that I do NOT share anyone's e-mail with anyone. I do not spam. I only send e-mails to people who need my response.


Pouch For Valentine's Gift (Card) >>> "Kapsicka" na Valentynsky Darek (napr. Volaci Kartu)

The other day my friend came for visit. Besides local "politics" we were also talking about children, upcoming Valentine's Day, and what to get for them. She told me she would love to give her teen daughter a gift card to her favorite store, but that she would love to give it to her in more special or personalized way and not just the "store" way... I asked her: "And where is problem? Crochet for her a "gift card" pouch, put the card inside. It cannot get any more personalized than that. After the Valentine's she can use it for her cell phone if it is small enough. Or use it to give someone else a gift card in it. It could be used even for some chocolate candies, or some tiny toy, or even money."

to the left you can see one that I made just for inspiration.

Step-by-Step Directions:
Pouch

Crochet thread (size 10) - double it.

1. ch 34 - connect with sl st
2. crochet twenty-eight rows of sc
3. create decorative bottom by connecting opposite sides - sl st first two opposite ch, ch 4, skip one, sl st the other two opposite ch, ch 4 and so on...

Heart (start from the tip)

I used a red color crochet thread

1. ch 3
2. one sc
3. turn around - 3 sc (increase at each end)
4. turn around - 5 sc (increase at each end)
.
.
when you have 11 to 13 stitches, divide them into two halves. work on one half at the time - decrease on each end one stitch -until you have 3 stitches left. Do the same for the other half. When finished with heart - sew it on. Insert the card inside and you have a personalized gift that comes from your heart.


**************************************************************************


Nedavno jsem mela kamaradku na navsteve a bavili jsme se o vsem moznem a rec samozrejme prisla i na deti a co jim koupit k Valentynovi. Kamaradka mi rekla, ze koupi dceri darkovou kartu, ale ze by rada aby to bylo vice osobni, nez takove "obchodni". Ptam se ji: "A kde je problem? Uhackuj ji malou mosnicku veliskosti te karty a vloz ji dovnitr a bude to vemi osobni. Po Valentynovi to muze pouzit jako kryt na svul mobil, jestli je jeji telefon maly, anebo muze nekomu dat darkovou kartu v teto "mosnicce". Dokonce muze byt pouzita na cokoladove bonbony, nebo na malilinkate hracicky, neboo na penize."

Vyse vidite foto jedne, kterou jsem uhackovala pro inspiraci.

Postup:
Mosnicka

Bila prize na hackovni (velikost 10) - dvojita.


1. zacneme na 34 ok - spojime retizkem
2. hackujeme 28 rad kratkych sloupku
3. vytvorime ozdobne dno shackovavanim dvou proti sobe lezicich ocek - takze retiskovym okem spojime prvni dve ocka, pak uhackujeme retizek ze 4 ocek, pak preskocime ocko a spojime dalsi proti sobe lezici - atd. Uknoncime a zacistime

Srdicko (zacneme od spicky)

Pouzila jsem cervenou prizi na hackovani


1. uhackujeme 3 retizky
2. v druhe rade uhackujeme 1 kratky sloupek
3. otocime - 3 kratke sl - tj. pridavame na kazdem konci
4. otocime - 5 kr sl - tj. pridavame na kazdem konci
.
.
kdyz mame 11 - 13 kr sl rozdelime na dve poloviny a tvorime obloucky (srdicka = kazde zvlast) ujimanim jednoho ocka na kazdem konci - az nam zustanou 3 sl. Srdicko prisijeme na mosniku.


A-Hand-Made-Pot-Holder-Especially-Made-For-Him >>> Chnapka-Jenom-Pro-Neho

I have given my husband many different gifts for his Valentine - a chocolate heart, a bottle of really good wine, and even the painting I painted myself. This year I decided to make a pot holder for him.

Do you have a mate that has never seen kitchen his entire life? Is he afraid that he  might burn himself while cooking a delicious meal for his loved ones and that's why he is staying out of this very important room? Do you want to lure him there? Well, you may try to convince him by a-hand-made-pot-holder-especially-made-for-him. The Valentine's Day is just around the corner and that could motivate him to cook a scrumptious meal for you in return for this fabulous hand made item. Perhaps, each time he holds it in his hand he will tell himself: "The dearest person to my heart made this and she put lots of love into it. It is time for me to go to our kitchen again and do a good deed." Well, even if it sound like a fairytale, I think this pot holder will fit your hand also.
PS. I do not want to sound too bias. You can change the word "he" for "she" if you are male.

What will you need? An old 100% wool sweater shrunk so much, that no one fits in it anymore. Scissors, big sewing needle, 100% wool in complimentary color to the sweater. With little patience and skill you can make a thick pot holder that you will be able to use on pots with boiling water (pasta) or taking cooking sheets from a very hot oven.

Step-by-Step Directions:

1. From the sweater cut out two rectangles aproximately 6 in. x 15 in. (the rectangles could be wider and longer, but this one fits on regular hand)
2. Place both rectangles on top of each other (line them up very well) and using a blanket stictch sew the two edges together. It will give your edge decorative feel. Do not make stitches tight, because when you wash your pot holder, the stitches will shrink.
3. After your short sides have been sewn, fold the rectangle in half and do the same for the sides. Only this time you will work through four layers.
4. Crochet a chain from wool (double thread) for a loop.
5. Wash in hot water, air dry by placing it on the towel.

Note: If you wish make some decoration, sew it on top of one rectangle before you start sewing the pot holder.

First image (above) is before washing the pot holder. The images below are after washing it in hot water:


*****************************************************************

Muj manzel dostal mnoho darecku k Valentynovi, od cokoladoveho srdce, pres kvalitni vino az k obrazu mnou namalovaneho. Tento rok dostane chnapku.

Mate pratnera, ktery nevidi kuchyn jak je zivot dlouhy? Boji se "vlezt" do kuchyne pac si mysli, ze se popali pri vareni chutneho jidla pro sve milovane spolubydlici? Chcete ho nalakat do kuchyne? Mozna se vam to podari rucne-vyrobenou-chnapkou-jenom-pro-neho. Valentynek je za rohem, a mozna by ho tento darecek, vyrobeny jen a jen pro neho, motivoval na oplatku uvarit jidlo jen a jen pro vas. Mozna pokazde, kdyz se na chnapku podiva nebo kdyz ji bude drzet v ruce, tak si rekne: "Nejmilejsi osoba meho zivota vyrobila tuto chnapku s velikou laskou. Je cas jit opet do nasi kuchyne delat dobre skutky." A jestli to zni jako pohadka, nezoufejte. Tato chnapka urcite padne i na vasi dlan jako ulita.
PS. Nechci znit zaujate proti muzum, ctenar si muze zensky rod zamenit za muzsky a naopak.

Takze, co potrebujete? Stary seprany vlneny svetr, ktery jiz nikdo nemuze nosit. Nuzky, velkou jehlu, a 100% vlnu v barve, ktera ladi se svetrem. S trochou trpelivosti a sikovnosti vytvorite hrubou chnapku, kterou lze pouzit na prenaseni velmi horkych hrncu, nebo na vyndavani plechu z trouby.

Postup:

1. Ze svetru si ustrihneme 2 obdelniky priblizne 16 cm x 40 cm (muze byt i sirsi a delsi, ale toto jsou miry pro  stredne velikou ruku)
2. Obdelniky polozime na sebe a obsijeme obe kratsi strany dvojitou vlnou (sesivate dve vrstvy). Pri sesivani pouzijte dekorativni steh, tolik typicky pro detske deky. Pozor - steh neutahujte, ponevadz se po vyprani vlneny steh srazi.

3. Po sesiti kratkych stran, prelozte obdelnik na polovinu a sesijte strany stejnym stylem. Pouze nyni budete pracovat se ctyrmi vrstvami.
4. Uhackujte poutko z dvojite vlny a prisijte.
5. Vyperte v horke vode a nechte uschnout na rozlozenem rucniku.

Poznamka: Jestli chcete ozdobit chnapku nejakou dekoraci, ucinte tak nez zacnete chnapku sesivat.