Search This Blog and The Web

Showing posts with label Hats. Show all posts

CROCHETED SIMPLE BUCKET HAT FROM RAFFIA

Crocheted Bucket Hat from Raffia

I would like to share a free pattern for my bucket hat from Raffia I made this summer. Raffia is a material, that is a little difficult to deal with, but if you take it in small steps, you could persevere in a few days.
Crocheting (or knitting) a bucket hat (or actually any hat) is a creative endeavor that allows you to express yourself, develop new skills, and enjoy the process of making something uniquely fashionable. What do you get out of it?

    1. Customization: Crocheting a bucket hat allows you to make a unique gift. You can choose your favorite colors, patterns, and yarn materials to design a hat that perfectly matches your or someone else's taste. 
    2. Handmade and Personal Touch: Making a bucket hat can be a thoughtful gift for someone special or a way to express your creativity and individuality. 
    3. Skill Development: Crocheting a bucket hat enhances your crocheting skills. You can learn new stitches, techniques, and patterns while working on the project, improving your abilities and expanding your repertoire of crochet skills. 
    4. Practicality and Versatility: Bucket hats are practical. They provide sun protection for your face and neck, making them suitable for outdoor activities such as gardening, beach outings, or picnics. Your imagination can offer a unique and stylish twist to this functional accessory.
    5. Relaxation and Mindfulness: Crocheting is known for its therapeutic benefits. It can help reduce stress, promote relaxation, and increase mindfulness. The repetitive motions and focus required in crocheting can be soothing, allowing you to unwind and enjoy the process.
    6. Cost-Effective: Crocheting your bucket hat can be a cost-effective alternative to buying one. Yarn and crochet hooks can be inexpensive, and you can create multiple hats from a single skein of yarn. You have the added self-satisfaction of making a unique gift using your hands.
    7. Connection and Community: People enjoy crocheting as a hobby. By joining crochet communities, online forums, or local knitting and crocheting groups, you can connect with fellow crafters, share your projects, and learn from others' experiences. 


Materials used:

2 cones of raffia, one in pink and one in black, which I purchased via AMAZON (by clicking on the link and purchasing Raffia, I will get a few pennies, which will support more of your free patterns.)


Abbreviations:

MC - main color (black)
CC - complimentary color (pink)
sc - single crochet stitch
st(s) - stitch(es)
incr - increase by crocheting 2 sc stitches in the same stitch


How To Measure For The Hat:


Measurements:

I usually make my hat a little smaller in diameter because it stretches. I did the same with Raffia material. So for example a head that has a circumference of 21 inches I would use 19 or 20 inches to calculate my diameter. Here I used 19".

Diameter of the top part: 6"
Height: 3.5"
Note: the total hat height is 6.5" without the brim
Brim width: 3" (but you can make the width any size you would like by decreasing or increasing rows)


TOP OF THE HAT

Use CC raffia 

Rnd 1            Into magic ring make 7 sc; (7) 
Note: place a marker (I use a string of yarn) between the first and last st and continue in the spiral way to keep track of the row beginning.
Rnd 2            incr (= 2 sc) in each st to end; (14)
Rnd 3            *[1 sc, incr]* - 7x; (21)
Rnd 4            *[1 sc in next 2 sts, incr]* - 7x; (28)
Rnd 5            *[1 sc in next 3 sts, incr]* - 7x; (35)
Rnd 6            *[1 sc in next 4 sts, incr]* - 7x; (42)
Rnd 7            *[1 sc in next 5 sts, incr]* - 7x; (49)
Rnd 8            *[1 sc in next 6 sts, incr]* - 7x; (56)
Rnd 9            *[1 sc in next 7 sts, incr]* - 7x; (63)
Rnd 10          *[1 sc in next 8 sts, incr]* - 7x; (70)
Rnd 11          *[1 sc in next 9 sts, incr]* - 7x; (77)
Rnd 12          *[1 sc in next 10 sts, incr]* - 7x; (84)


BODY OF THE HAT

Change the color - use MC raffia.

Rnd 13-?          1 sc in each st to end; (84)

Crochet as many rows as you need to achieve the height of your hat. I crocheted 15 rows (Rnds 13-27), which reached the top of my eyebrows. I could have done just 13 rows.


BRIM OF THE HAT

Continue with MC of your raffia.

Rnd 28          *[1 sc in next 11 sts, incr]* - 7x; (91)
Rnd 29          *[1 sc in next 12 sts, incr]* - 7x; (98)
Rnd 30          *[1 sc in next 13 sts, incr]* - 7x; (105)
Rnd 31          *[1 sc in next 14 sts, incr]* - 7x; (112)
Rnd 32          *[1 sc in next 15 sts, incr]* - 7x; (119)
Rnd 33          *[1 sc in next 16 sts, incr]* - 7x; (126)
Rnd 34          *[1 sc in next 17 sts, incr]* - 7x; (133)
Rnd 35          *[1 sc in next 18 sts, incr]* - 7x; (140)
Rnd 36          *[1 sc in next 19 sts, incr]* - 7x; (147)
Rnd 37          *[1 sc in next 20 sts, incr]* - 7x; (154)


FINISH

Rnd 38            Crochet one row without any increases in CC of your raffia.

When you are finished, weave your ends into the stitches. You can sew a ribbon on the inside. You could decorate your hat per your desire. 


Copyright:
You may not sell my written pattern to anyone, and you may not publish it as your own.
However, you may sell a finished product (socks) made by you.

Thank you.
***

DID YOU FIND ERRORS? Let me know on what page of my blog, and in which row by clicking HERE, and I will fix it as soon as I get to it. You can PM me on my FB Page HERE as well. Txs!
Also if you haven't subscribed to my HandmadeRukodelky Channel, you can do it HERE. There are many videos to be seen, too.

*******************************************************************************


Copyright page - click HERE


PLEASE, COMMENT ON YOUTUBE BELOW MY VIDEOS, AND/OR SHARE YOUR IMAGES OF YOUR RECREATED WORKS ON MY FB PAGE HERE :-)


COTTON CANDY ELF BABY HAT


In 2015  I visited one small town in New York State. Since I am an artist and an avid knitter and a crocheter I obviously had to stop at a local yarn store. OMG. This lady owner supplies her knitting community with the most gorgeous selection of yarns from many artisan spinners. Most of her yarns are VERY expensive, but these yarns are a pure art form. I wanted to take a thousand dollars and spent it there. Unfortunately, I could not do it. I have a budget and that is just it. So I settled for ONE skein of the most beautiful "pinkiest" and softest yarn I saw in the store. In my mind, I saw a beautiful princess in a beautiful hat! And so did my husband. If I would be younger I would try to have another baby just because of this softest skein of yarn. But... I just bought the yarn. Actually, my husband made me buy it. 
And I decided to write a pattern for this hat as I knit. Just a simple, plushy, soft, gorgeous, pointy elf hat. For a little princess.

This yarn is thick and thin. Very textured. And gorgeously pink. I am sure the computer image will not do justice to the color of my fluffy yarn.

I decided to use 9mm knitting needles and knit a simple pointy hat on DPNs. As I am knitting (and writing this post) I already LOVE how the hat is turning out (and I am wishing I would have a 6-12 month-old baby). So, here is the pattern:

September 2022 update: Yippie,  I have someone to gift this hat to. I decided to make a short "show and tell" video to share with you - you can CLICK HERE (coming soon).

ALSO:
Please, consider supporting my blog and YouTube Channel by shopping on Amazon via MY AFFILIATE LINK. Thank you if you purchase anything. And I mean anything. Just click on the link and purchase anything you need. It won't cost you anything extra.


MATERIALS:

  • A Very Bulky Thick and Thin Yarn (any comparable very bulky yarn you can find and love)
  • Knitting Needles #13 (9mm)
  • Scissors
  • Yarn needle
SIZE:


Step-by-Step:

CO 36 sts and distribute sts evenly among 3 DPNs

Row 1-16          K36
Row 17             *[K4, k2tog]* - 6x
Row 18-21        K30
Row 22             *[K3, k2tog]* - 6x
Row 23-27        K24
Row 28             *[K2, k2tog]* - 6x
Row 29-34        K18
Row 35             *[K1, k2tog]* - 6x
Row 36-42       K12
Row 43             *[k2tog]* - 6x
Row 44-51       K6
Row 52             *[k2tog]* - 3x
Row 53-60       K3

BO by pulling yarn through all 3 stitches. Make ch2. Attach a pom-pom. Sell the hat. Or give it away.


Copyright:
You may not sell my written pattern to anyone, and you may not publish it as your own.
However, you may sell a finished product (any item) made by you. Credit me, please.

Thank you.
***

DID YOU FIND ERRORS? Let me know on what page of my blog, and in which row by clicking HERE, and I will fix it as soon as I get to it. You can PM me on my FB Page HERE as well. Txs!
Also if you haven't subscribed to my HandmadeRukodelky Channel, you can do it HERE. There are many videos to be seen, too.

*******************************************************************************


Copyright page - click HERE


PLEASE, COMMENT ON YOUTUBE BELOW MY VIDEOS, AND/OR SHARE YOUR IMAGES OF YOUR RECREATED WORKS ON MY FB PAGE HERE :-)


Note: Most of the time I work as fast as I can to keep up with knitting and crocheting requests. I have to videotape, edit videos, then convert them & upload them to my channel. After that often I post on my blog patterns. I answer many questions, which means that often I work up to 16 hours a day. I would tremendously appreciate IF anyone of you who finds an error in the written pattern, so please, let me know - where (what rows) and what may be the problem. Many future knitters & crocheters from our artsy and crafty virtual world will thank you for your good deed, including myself.


Snow White Knitted Bunny Hat

I do get requests for occasional projects. And not too long ago a knitter asked me to make a bunny hat for a 5/6-year-old. Since I have a big stash of yarn, I found a white yarn (no label but I think it is Lion Brand's Pound of Love, since it looks the same as my blue colored yarn that is Pound of Love that has a label). Then I needed a pink yarn for the inner part of the rabbit's ear. I had a leftover from Mandala Cake (also Lion Brand). However, that yarn was a little thinner which was perfect for my purpose. The hat was knitted from just one strand. When I was working on the ears' white part I used 2 strands, but for the pink part, I used one strand only.
Now if you would like to make the hat smaller you could (cast on 80 sts to make it 16" in diameter) and of course, knit a lower number of rows to make the hat shorter.
Add eyes, a nose, and whiskers if you wish.

Of course, for people that do better knitting along with the videos, I recorded my knitting. If you like to read patterns for the hat and for the ears - scroll down.

Please, consider supporting my blog and YouTube Channel by shopping on Amazon via MY AFFILIATE LINK. Thank you if you purchase anything.


VIDEOS FOR RIGHTIES: click HERE 4 HAT, and how to knit EARS CLICK HERE

VIDEOS FOR LEFTIES: click HERE 4 HAT, and how to knit EARS CLICK HERE

Materials:
Yarn #1 - Lion Brand Yarns; Pound of Love; Color White; Medium (4); 100% acrylic; Skein Weight: 16 oz/448 g; 1020 yd/932 m; I used about 50 g (~ 120 yards)
Yarn #2 - Lion Brand Yarns, Mandala Cake; Color: Unicorn; Light (3); 100% acrylic; 5.3 oz/150g; 590 yd/540 m; I used few yards of the pink part
Knitting Needles: 4.5 mm (for a hat and pink ears) & 6 mm (for white ears)
Hook (for closing the top of the hat - see the video)
Yarn Needle (for sewing ears onto the hat)
Scissors

Gauge:
1"x1" = 5 sts x 7 rows

Size:
Hat - Width 18" & Height 7"
Ears - Width 3.25" & Height 4.75"

Abbreviations:
CO - cast on
K - knit
P - purl
SSK - slip first stitch knit-wise, slip second stitch knit-wise, place them back on the needle and knit through the back loop
K2tog - knit two stitches together
BO - bind of

HAT

CO 90 sts

Row 1                 *[K1, P1]* - to end, join into a circle
Row 2-14            *[K1, P1]* - to end
Row 15-42          K90

Decrease for the top as such:
Row 43                *[SSK, K8]* - 9x
Row 44                K81
Row 45                *[SSK, K7]* - 9x
Row 46                K72
Row 47                *[SSK, K6]* - 9x
Row 48                K63
Row 49                *[SSK, K5]* - 9x
Row 50                K54
Row 51                *[SSK, K4]* - 9x
Row 52                K45
Row 53                *[SSK, K3]* - 9x
Row 54                K36

EARS
Make 4 - make 2 with a double strand of white yarn, and make 2 with a single strand of pink yarn.

CO 12 sts, for white yarn use 6 mm knitting needles, for pink yarn use 4.5 mm knitting needles. Leave long tails for sewing.

Row 1-24             K12
Row 25                K1, k2tog, K6, SSK, K1
Row 26-28           K10
Row 29                 
K1, k2tog, K4, SSK, K1
Row 30                 K10
Row 31                 K1, k2tog, K2, SSK, K1
Row 32                 K1, k2tog, SSK, K1
Row 33                 BO

FINISHING

Sew the pink part of the ear on the top of the white ear, then sew the white ear onto the hat. Use your judgment on how you would like to have them placed on the top of the hat. When finished, weave in all the tails.

***

DID YOU FIND ERRORS? Let me know on what page of my blog, and in which row by clicking HERE, and I will fix it as soon as I get to it. You can PM me on my FB Page HERE as well. Txs!
Also if you haven't subscribed to my HandmadeRukodelky Channel, you can do it HERE. There are many videos to be seen, too.

**************************************************


Copyright page - click HERE


PLEASE, COMMENT ON YOUTUBE BELOW MY VIDEOS, AND/OR SHARE YOUR IMAGES OF YOUR RECREATED WORKS ON MY FB PAGE HERE :-)


Note: Most of the time I work as fast as I can to keep up with knitting and crocheting requests. I have to videotape, edit videos, then convert them & upload them to my channel. After that often I post on my blog patterns. I answer many questions, which means that often I work up to 16 hours a day. I would tremendously appreciate IF anyone of you finds an error in the written pattern, so please, let me know - where (what rows) and what may be the problem. Many future knitters & crocheters from our artsy and crafty virtual world will thank you for your good deed, including myself.

Unisex Baby Hat On Straight Needles

A few weeks ago I had a request to make a video of a hat knitted on straight knitting needles. This hat is simple enough for any beginner that mastered cast on, bind off, knit and purl stitches, and can follow a tutorial on how to do decreases (in my video). Below you will find links to the videos (for right-handed and left-handed knitters) and also my written pattern.
The written pattern is for 6 months old baby (M size), but if you would like to knit the hat for a small (S size) baby, then cast on 8 stitches less (70 sts) and knit a lower number of rows to accommodate for the height of the smaller head (6 - 10 fewer rows). If you would like to knit the hat for a bigger baby (L size) then you can add 8 stitches (86 sts), and if needed knit more rows in the middle part. You would also adjust the number of stitches between decreases.
I decided to calculate stitches for Small and Large sizes for you - just in case, you would like to make a smaller or bigger hat.
Please let me know of any mathematical errors in my pattern.
Enjoy.

Videos:
FOR LEFT HANDED KNITTERS - COMING SOON

Size:

Small and Large sizes are calculated mathematically, therefore the measurements are approximate. The Medium size is more accurate (my measured hat)
  • head circumference - approx. S-12.5", M-14", L-15.5" (unstretched), up to 14"-18"-20" (stretched) 
  • hat height - approx. 6"-7"-7.5"
  • ribbing height  - 1"


Gauge:
10 sts & 20 rows = 2” (garter stitch)

Material:

Abbreviations:

S - small size (0-3 months)
M - medium size (6 months)
L - large size (9-12 months)
CO - cast on
K - knit
P - purl
sl last st wyf - slip first stitch purl-wise with yarn in front
CDD - Center Double Decrease - first insert your working needle knit-wise through the first two stitches on your main needle, then slip them off together (DO NOT knit them together, just slip them), knit the next stitch, and then pass both slipped stitches together over the stitch you just knitted 
st(s) - stitch(es)


Step-by-Step Directions:

Foundation - cast on 70-78-86 stitches

RIBBING:

Row 1-6            *[K1, P1]* - to end of the row, turn


MIDDLE PART:

Let's start row count from 1

Rnd 1-43                K1tbl, K68-76-84, sl last st wyf

Knit until your middle part measures approximately 3.75"- 4.25"- 4.75". My middle part measured 4.25"


VERSION #1

DECREASING FOR THE TOP OF THE HAT:

This seam is one stitch off-center


This decrease part is written according to my video (see above), which I was making without any pattern. It was more or less free knitting - I was designing the hat as I was videotaping. However, the seam is one stitch off-center. 
If you want perfectly centered seam, see VERSION #2 with the CENTERED DECREASE  below.

Let's start row count from 1

Rnd 1                K1tbl, K8-9-10, CDD, *[K14-16-18, CDD]* - repeat 3x, K6-7-8, sl last st wyf
Rnd 2                K1tbl, K6-7-8, P1, *[K14-16-18, P1]* - repeat 3x, K8-9-10, sl last st wyf
Rnd 3                K1tbl, K7-8-9, CDD, *[K12-14-16, CDD]* - repeat 3x, K5-6-7, sl last st wyf
Rnd 4                K1tbl, KK5-6-7, P1, *[K12-14-16, P1]* - repeat 3x, K7-8-9, sl last st wyf
Rnd 5                K1tbl, K6-7-8, CDD, *[K10-12-14, CDD]* - repeat 3x, K4-5-6, sl last st wyf
Rnd 6                K1tbl, K4-5-6, P1, *[K10-12-14, P1]* - repeat 3x, K6-7-8, sl last st wyf
Rnd 7                K1tbl, K5-6-7, CDD, *[K8-10-12, CDD]* - repeat 3x, K3-4-5, sl last st wyf
Rnd 8                K1tbl, K3-4-5, P1, *[K8-10-12, P1]* - repeat 3x, K5-6-7, sl last st wyf
Rnd 9                K1tbl, K4-5-6, CDD, *[6-8-10, CDD]* - repeat 3x, K2-3-4, sl last st wyf
Rnd 10              K1tbl, K2-3-4, P1, *[K6-8-10, P1]* - repeat 3x, K4-5-6, sl last st wyf
Rnd 11              K1tbl, K3-4-5, CDD, *[K4-6-8, CDD]* - repeat 3x, K1-2-3, sl last st wyf
Rnd 12              K1tbl, K1-2-3, P1, *[K4-6-8, P1]* - repeat 3x, K3-4-5, sl last st wyf
Rnd 13              K1tbl, K2-3-4, CDD, *[K2-4-6, CDD]* - repeat 3x, K0-1-2, sl last st wyf
Rnd 14              K1tbl, K0-1-2, P1, *[K2-4-6, P1]* - repeat 3x, K2-3-4, sl last st wyf

FINISHING THE SMALL HAT:
With the use of hook pull yarn through all the remaining stitches, make a knot. Then sew your sides together (line up your stitches well) and weave in all your loose ends (tails).

Rnd 13              K1tbl, K2-3, CDD, *[K2-4, CDD]* - repeat 3x, K0-1, sl last st wyf
Rnd 14              K1tbl, K0-1, P1, *[K2-4, P1]* - repeat 3x, K2-3, sl last st wyf

FINISHING THE MEDIUM HAT:
With the use of hook pull yarn through all the remaining stitches, make a knot. Then sew your sides together (line up your stitches well) and weave in all your loose ends (tails).

Rnd 15              K1tbl, K2, CDD, *[K2, CDD]* - repeat 3x, sl last st wyf
Rnd 16              K1tbl, P1, *[K2, P1]* - repeat 3x, K2, sl last st wyf

FINISHING THE LARGE HAT:
With the use of hook pull yarn through all the remaining stitches, make a knot. Then sew your sides together (line up your stitches well) and weave in all your loose ends (tails).


VERSION #2

PERFECTLY CENTERED DECREASE FOR THE TOP OF THE HAT AND CENTERED SEAM

Here you can see perfectly centered seam
Here you can see a perfectly centered seam


Let's start row count from 1

Rnd 1                K1tbl, K7-8-9, CDD, *[K14-16-18, CDD]* - repeat 3x, K7-8-9, sl last st wyf
Rnd 2                K1tbl, K7-8-9, P1, *[K14-16-18, P1]* - repeat 3x, K7-8-9, sl last st wyf
Rnd 3                K1tbl, K6-7-8, CDD, *[K12-14-16, CDD]* - repeat 3x, K6-7-8, sl last st wyf
Rnd 4                K1tbl, K6-7-8, P1, *[K12-14-16, P1]* - repeat 3x, K6-7-8, sl last st wyf
Rnd 5                K1tbl, K5-6-7, CDD, *[K10-12-14, CDD]* - repeat 3x, K5-6-7, sl last st wyf
Rnd 6                K1tbl, K5-6-7, P1, *[K10-12-14, P1]* - repeat 3x, K5-6-7, sl last st wyf
Rnd 7                K1tbl, K4-5-6, CDD, *[K8-10-12, CDD]* - repeat 3x, K4-5-6, sl last st wyf
Rnd 8                K1tbl, K4-5-6, P1, *[K8-10-12, P1]* - repeat 3x, K4-5-6, sl last st wyf
Rnd 9                K1tbl, K3-4-5, CDD, *[K6-8-10, CDD]* - repeat 3x, K3-4-5, sl last st wyf
Rnd 10              K1tbl, K3-4-5, P1, *[K6-8-10, P1]* - repeat 3x, K3-4-5, sl last st wyf
Rnd 11              K1tbl, K2-3-4, CDD, *[K4-6-8, CDD]* - repeat 3x, K2-3-4, sl last st wyf
Rnd 12              K1tbl, K2-3-4, P1, *[K4-6-8, P1]* - repeat 3x, K2-3-4, sl last st wyf
Rnd 13              K1tbl, K1-2-3, CDD, *[K2-4-6, CDD]* - repeat 3x, K1-2-3, sl last st wyf
Rnd 14              K1tbl, K1-2-3, P1, *[K2-4-6, P1]* - repeat 3x, K1-2-3, sl last st wyf

FINISHING THE SMALL HAT:
With the use of hook pull yarn through all the remaining stitches, make a knot. Then sew your sides together (line up your stitches well) and weave in all your loose ends (tails).


Rnd 13              K1tbl, K1-2, CDD, *[K2-4, CDD]* - repeat 3x, K1-2, sl last st wyf
Rnd 14              K1tbl, K1-2, P1, *[K2-4, P1]* - repeat 3x, K1-2, sl last st wyf

FINISHING THE MEDIUM HAT:
With the use of hook pull yarn through all the remaining stitches, make a knot. Then sew your sides together (line up your stitches well) and weave in all your loose ends (tails).


Rnd 15              K1tbl, K1, CDD, *[K2, CDD]* - repeat 3x, K1, sl last st wyf
Rnd 16              K1tbl, K1, P1, *[K2, P1]* - repeat 3x, K1, sl last st wyf

FINISHING THE LARGE HAT:
With the use of hook pull yarn through all the remaining stitches, make a knot. Then sew your sides together (line up your stitches well) and weave in all your loose ends (tails).


Copyright:
You may not sell my written pattern to anyone, and you may not publish it as your own.
However, you may sell a finished product (a hat) made by you. Don't forget to credit me.

Thank you.
***

DID YOU FIND ERRORS? Let me know on what page of my blog, and in which row by clicking HERE, and I will fix it as soon as I get to it. You can PM me on my FB Page HERE as well. Txs!
Also if you haven't subscribed to my HandmadeRukodelky Channel, you can do it HERE. There are many videos to be seen, too.

*******************************************************************************


Copyright page - click HERE


PLEASE, COMMENT ON YOUTUBE BELOW MY VIDEOS, AND/OR SHARE YOUR IMAGES OF YOUR RECREATED WORKS ON MY FB PAGE HERE :-)


Note: Most of the time I work as fast as I can to keep up with knitting and crocheting requests. I have to videotape, edit videos, then convert them & upload them to my channel. After that often I post on my blog patterns. I answer many questions, which means that often I work up to 16 hours a day. I would tremendously appreciate IF anyone of you who finds an error in the written pattern, so please, let me know - where (what rows) and what may be the problem. Many future knitters & crocheters from our artsy and crafty virtual world will thank you for your good deed, including myself.

Sunny Day Hat

In January, I knitted hats and socks for my neighbors' newborn twins from Cloudborn Fibers (see the image below). I used Rose Heather, Powder Blue, and Antique White colors. I am kind of sad because I didn't take a good picture of my hats, just a couple of snapshots at night. However, two months ago I decided to make a video, how to knit these hats. I used two balls of yarn (one green and one yellow), which I bought on sale about three years ago. As I am writing this post, I realized that Bernat's Cotton-ish yarn (which I used while recording my video) is discontinued. At home, I have a yarn very similar in weight/cotton/acrylic blend - Premier Yarns, Cotton Fair. If you wish to knit this hat you may have to substitute Bernat's yarn with Premier Yarns. I also found a website that may help you with other substitutions - CLICK ON THIS LINK.
I cast the pink and blue hats on 80 stitches because the yarn is slightly thinner than the yellow/green yarn. I cast my yellow/green hat on 70 sts. The decreases for the top and the number of rows were the same - the only difference was in how many stitches I pulled the yarn through. 

You can adjust this hat to any size just by calculating how many "10 stitch repeats" and how many "row repeats" you need. You would not have to change anything regarding decreases except how many times you need to repeat them, because decreases are the same in each repeat. However, in your last row, you would end up with more stitches that you'd have to pull yarn through. In my pink and blue hats, I had to pull yarn through 40 stitches (8 stitch repeats), in my yellow/green hat I pulled the yarn through 35 sts (7 stitch repeats).

This pattern uses slip-stitches. It is a very simple pattern, easy to do even for a novice knitter. You can either follow my Step-by-Step (row-by-row) pattern or you can click on any video (for righties or lefties) below. Or follow both - the written pattern and the video.

Videos:

Original Hat and Socks For Newborn Twins - HandMadeRukodelky ©2020


Size:
  • head circumference - 12" (unstretched), up to 15" (stretched)
  • hat height - 6.5"
  • ribbing height  - 2.25"
Gauge:
12 sts & 15 rows = 2” (stockinette)

Materials:
Any yarn similar to Bernat's Cotton-ish that is DK Weight (thicker than Sport weight, thinner than Worsted weight); cotton/acrylic blend; you will need two complementary colors (1 ball of Main Color, less than 1/2 ball Complimentary color)
Knitting Needle: I used US 5 (3.75 mm) needles
Yarn needle
Scissors 

Abbreviation:
DPN(s) - double-pointed needle(s)
CO - cast on
MC - main color
CC - complimentary color
K - knit
P - purl
sl 1st st - slip first stitch purl-wise
K2tog - Knit 2 stitches together
SSK - slip 1st stitch knit-wise, slip 2nd st knitwise, place them back on the initial needle, then knit both sts through the back loop
st(s) - stitch(es)


Step-by-Step Directions:
Pattern repeat - 10 sts, and 14 rows.
Start foundation with MC color on knitting needles #5 (3.75 mm) - cast on 70 stitches

PATTERN (knitted in the round):


RIBBING:

Row 1            (MC) *[K1, P1]* - to end of the row, then distribute the stitches among 3 DPNs (or use circular needles with a long cable and magic loop), without twisting your knitted row, connect stitches into a circle
Rnd 2-20       (MC) *[K1, P1]* - to end


PATTERN PART:

Let's start row count from 1

Rnd 1                (CC) K70
Rnd 2                (CC) P70
Rnd 3-7             *[sl 2 CC st pw; K8 MC]* - 7x
Rnd 8                (CC) K70
Rnd 9                (CC) P70
Rnd 10-14         *[K5 MC; sl 2 CC st pw; K3 MC]* - 7x

Repeat Rnds 1-14 one more time (total 28 rows)


DECREASING FOR THE TOP OF THE HAT:

Let's start row count from 1

Rnd 1                (CC) K70
Rnd 2                (CC) P70
Rnd 3                *[sl 2 CC st pw; MC- K1, K2tog, K2, SSK, K1]* - 7x
Rnd 4-6             *[sl 2 CC st pw; K6 MC]* - 7x
Rnd 7                *[sl 2 CC st pw; MC- K2tog, K2, SSK]* - 7x
Rnd 8                (CC) K70
Rnd 9                (CC) P70
Rnd 10-11         *[K3 MC; sl 2 CC st pw; K1 MC]* - 7x
Rnd 12              *[MC - K2tog, K1; sl 2 CC st pw; K1 MC]* - 7x
Rnd 13-14         *[K2 MC; sl 2 CC st pw; K1 MC]* - 7x
Rnd 15              (CC) K35
Rnd 16              (CC) P35


FINISHING:

With the use of hook pull yarn through all the stitches, make a knot. Then weave in all your loose ends (tails).


Copyright:
You may not sell my written pattern to anyone, and you may not publish it as your own.
However, you may sell a finished product (a hat) made by you. Don't forget to credit me.

Thank you.
***

DID YOU FIND ERRORS? Let me know on what page of my blog, and in which row by clicking HERE, and I will fix it as soon as I get to it. You can PM me on my FB Page HERE as well. Txs!
Also if you haven't subscribed to my HandmadeRukodelky Channel, you can do it HERE. There are many videos to be seen, too.

*******************************************************************************


Copyright page - click HERE


PLEASE, COMMENT ON YOUTUBE BELOW MY VIDEOS, AND/OR SHARE YOUR IMAGES OF YOUR RECREATED WORKS ON MY FB PAGE HERE :-)


Note: Most of the time I work as fast as I can to keep up with knitting and crocheting requests. I have to videotape, edit videos, then convert them & upload them to my channel. After that often I post on my blog patterns. I answer many questions, which means that often I work up to 16 hours a day. I would tremendously appreciate IF anyone of you who finds an error in the written pattern, so please, let me know - where (what rows) and what may be the problem. Many future knitters & crocheters from our artsy and crafty virtual world will thank you for your good deed, including myself.

Marigolds By The Lake - Baby Set


MISTI ALPACA - a wonderfully soft yarn for any baby project. This is a sock yarn, but it is so soft that any baby will love to wear it. The yarn is 50% Alpaca, 30% Merino, 10% silk, and 10% Nylon. You cannot go wrong.

I am a big fan - look for a video where I will show you my niece's baby wearing the hat, gloves, and socks I knitted as a gift. 

Should you want to knit it yourself here is a link to a free pattern in my RAVELRY SHOP.

Enjoy.


IF YOU'D LOVE TO KNIT ALONG WITH MY VIDEOS, VISIT MY YOUTUBE CHANNEL. There are many videos for right-handed knitters and for left-handed knitters as well.

Copyright:
You may NOT sell my written pattern or publish it as YOUR own.
However, you may sell a finished product (socks) you made.

Thank you.
***

DID YOU FIND ERRORS? Let me know on what page of my blog, and in which row by clicking HERE, and I will fix it as soon as I get to it. You can PM me on my FB Page HERE as well. Txs!
Also if you haven't subscribed to my HandmadeRukodelky Channel, you can do it HERE. There are many videos to be seen, too.

*******************************************************************************


Copyright page - click HERE


PLEASE, COMMENT ON YOUTUBE BELOW MY VIDEOS, AND/OR SHARE YOUR IMAGES OF YOUR RECREATED WORKS ON MY FB PAGE HERE :-)


Note: Most of the time I work as fast as I can to keep up with knitting and crocheting requests. I have to videotape, edit videos, then convert them & upload them to my channel. After that often I post on my blog patterns. I answer many questions, which means that often I work up to 16 hours a day. I would tremendously appreciate IF anyone of you who finds an error in the written pattern, so please, let me know - where (what rows) and what may be the problem. Many future knitters & crocheters from our artsy and crafty virtual world will thank you for your good deed, including myself.

Little Hats Big Hearts Project - Red Hat 4 Newborns


UPDATE:
PLEASE BE AWARE THAT AMERICAN HEART ASSOCIATION DOESN'T ACCEPT THESE HATS ANYMORE. INSTEAD, THEY ACCEPT FINANCIAL DONATIONS AND/OR VOLUNTEER HELP. YOU CAN KNIT THESE AS A VALENTINE'S GIFT. ❤️❤️❤️

A couple of months ago, my friend (fabulous and talented Iris) shared a link to the "LITTLE HATS BIG HEARTS" project with me. In it, the AMERICAN HEART ASSOCIATION asked knitters and crocheters in the US to make red hats for NEWBORN BABIES to raise awareness for "Congenital Heart Defects."
The requested specifics are that yarn needs to be: red, cotton, or acrylic, medium to heavyweight, and machine washable and dryable.
I got excited about this project and decided not only to make these hats, but also to write two patterns for my followers (one for hat knitted in the round, and one for hat knitted on straight knitting needles), and make three videos of hats - one knitted with DPNs, one knitted with circulars and one knitted on straight needles. And on top of that, these three videos for right-handed edit also for left-handed knitters (total six videos).
Although I am not very strong in the English style of knitting, I included a few times both versions - the Continental style of knitting and English too.

For the two hats knitted either with DPNs or circular needles, you need to know how to knit in the round. The hat knitted on straight needles is more comfortable to knit, but then you have to deal with a seam. However, all you need to know, to knit these hats, is how to cast on, how to knit and purl, how to bind off, and for hat knitted flat also how to sew or crochet the two side seams together.

I know it is already February, and hospitals may not accept hats anymore (please check either with your local hospital OR with American Heart Association if they are still accepting hats in your area). However, you could make a newborn hat with hearts for Valentine's baby, or for your family member or a friend that will be Mom soon.

This hat is not only great for spreading awareness about "Congenital Heart Defects," but also just for giving a hat with heart - also a meaning for LOVE. And while you are reading this, please, check out my "SHAKEN BABY SYNDROME PURPLE HAT" post - which I wrote a while back about another so much needed awareness. There is a free written pattern, plus links to videos for right-handed and left-handed knitters. Spread the love, and spread the wisdom you learn from reading educational articles online (click on the provided links throughout this article).

Thank you all.

BELOW ARE LINKS FOR THE SIX VIDEOS - FOR RIGHTIES AND LEFTIES: 

CLICK HERE FOR HAT #1 KNITTED ON DPNs FOR RIGHTIES
CLICK HERE FOR HAT #1 KNITTED ON DPNs FOR LEFTIES

CLICK HERE FOR HAT #2 KNITTED ON CIRCULARS FOR RIGHTIES
CLICK HERE FOR HAT #2 KNITTED ON CIRCULARS FOR LEFTIES
In these two videos, you will see a good demonstration of using a so-called "magic loop" while knitting with circular needles.

CLICK HERE FOR HAT #3 KNITTED ON STRAIGHT NEEDLES FOR RIGHTIES
CLICK HERE FOR HAT #3 KNITTED ON STRAIGHT NEEDLES FOR LEFTIES


Abbreviations:
CO - cast on
DPN - double pointed needles
K - knit
P - purl
M - marker
K2tog - knit 2 stitches together
BO - bind off by pulling yarn through remaining sts
sl sts - slip stitches

Gauge:
My gauge corresponds to a manufacturer's gauge on any yarn label

Materials (if you shop online via my affiliated links below, I would get few pennies, which would help to fund my future projects TXS):
Michaels online store, OR Hobby Lobby, OR Jo-Ann Fabrics, OR Walmart 
Yarn - any washable red, acrylic, medium weight (#4, worsted) - see below which ones I used
Knitting needles - all these hats were knitted on same sized needles: US #7 (4.5mm)
Hook - I used 4mm hook
Yarn Needle (for weaving in the tail, optional)
Scissors

Size:
Circumference: 12"-13"
Height: 5"


HAT #1 - KNITTED ON DPNs - about 1/4 ball of yarn by Loops & Threads, Impeccable; medium worsted #4; color Cherry; 100% acrylic
&
HAT #2 - KNITTED ON CIRCULARS - about 1/4 ball of yarn by Red Heart, Super Saver; medium worsted #4; color Hot Red; 100% acrylic

HAT #1

HAT #2


Step-by-Step:

CO 54 sts on long needles (4.5 mm)

Row 1              knit the first row of ribbing as such: *(K1, P1)* - repeat to end; then distribute stitches evenly among 3 DPNs (18-18-18 sts on each needle), OR move your sts onto your circular knitting needles; then join into circle (make sure stitches are not twisted when joining)
Rnd 2-8           *(K1, P1)* - repeat 27x in each row
Rnd 9-11          K54, in 11th round place M every 9 sts
Rnd 12-13        *[K4, P1, K4]* - 6x
Rnd 14-15        *[K3, P3, K3]* - 6x
Rnd 16-17        *[K2, P5, K2]* - 6x
Rnd 18-19        *[K1, P7, K1]* - 6x
Rnd 20-21        *[K1, P3, K1, P3, K1]* - 6x
Rnd 22             *[K2, P1, K3, P1, K2]* - 6x
Rnd 23-26         K54 - remove your M
Rnd 27              *[K4, K2tog]* - 9x
Rnd 28              K45
Rnd 29              *[K3, K2tog]* - 9x
Rnd 30              K36
Rnd 31              *[K2, K2tog]* - 9x
Rnd 32              K27
Rnd 33              *[K1, K2tog]* - 9x

You will have 18 sts left on your needles - elongate your last knitted stitch by pulling it and pull it through remaining stitches with a hook. Make a knot, and weave in your tails on the inside of your hat.


HAT #3 - KNITTED ON STRAIGHT KNITTING NEEDLES - about 1/4 ball of yarn by Caron, Simply Soft; medium worsted #4; color Autumn Red; 100% acrylic

HAT #3


Step-by-Step:

CO 54 sts on long needles (4.5 mm)

Row 1-8           *(K1, P1)* - repeat 27x in each row
Rnd 9               K54
Rnd 10             P 54
Rnd 11             K54
Rnd 12             P 54
Rnd 13            *[K4, P1, K4]* - 6x
Rnd 14            *[P4, K1, P4]* - 6x
Rnd 15            *[K3, P3, K3]* - 6x
Rnd 16            *[P3, K3, P3]* - 6x
Rnd 17            *[K2, P5, K2]* - 6x
Rnd 18            *[P2, K5, P2]* - 6x
Rnd 19            *[K1, P7, K1]* - 6x
Rnd 20            *[P1, K7, P1]* - 6x
Rnd 21            *[K1, P3, K1, P3, K1]* - 6x
Rnd 22            *[P1, K3, P1, K3, P1]* - 6x
Rnd 23             *[K2, P1, K3, P1, K2]* - 6x
Rnd 24             P 54 - remove your M
Rnd 25             K54
Rnd 26             P 54
Rnd 27             *[K4, K2tog]* - 9x
Rnd 28             P45
Rnd 29             *[K3, K2tog]* - 9x
Rnd 30             P36
Rnd 31             *[K2, K2tog]* - 9x
Rnd 32             P27
Rnd 33             *[K1, K2tog]* - 9x

You will have 18 sts left on your needles - elongate your last knitted stitch by pulling it and insert it through the remaining stitches with a hook. Make a knot, sew or crochet your sides together and weave in your tails on the inside of your hat. If you will crochet your sides (see the video knitting with straight needles) use sl sts - do not crochet with single crochet stitches, it would be too thick.

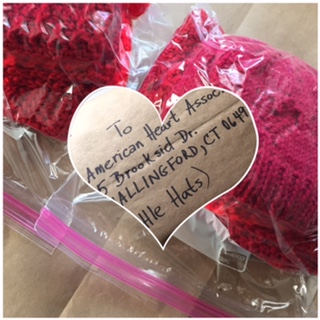
Donated hats - thank you Iris for the idea and hats!


***

DID YOU FIND ERRORS? Let me know on what page of my blog, and in which row by clicking HERE, and I will fix it as soon as I get to it. You can PM me on my FB Page HERE as well. Txs!
Also if you haven't subscribed to my HandmadeRukodelky Channel, you can do it HERE. There are many videos to be seen, too.

*******************************************************************************


Copyright page - click HERE


PLEASE, COMMENT ON YOUTUBE BELOW MY VIDEOS, AND/OR SHARE YOUR IMAGES OF YOUR RECREATED WORKS ON MY FB PAGE HERE :-)


Note: Most of the time I work as fast as I can to keep up with knitting and crocheting requests. I have to videotape, edit videos, then convert them & upload them to my channel. After that often I post on my blog patterns. I answer many questions, which means that often I work up to 16 hours a day. I would tremendously appreciate IF anyone of you who finds an error in the written pattern, so please, let me know - where (what rows) and what may be the problem. Many future knitters & crocheters from our artsy and crafty virtual world will thank you for your good deed, including myself.

Shaken Baby Syndrome Purple Hat

Knitted "Shaken Baby Syndrome Purple Hats"  
One of my virtual knit/crochet friends shared with several of us, knitters, a link (see below) about donating purple hats for Shaken Baby Syndrome (SBS). Furthermore, I found an article that talks about the science behind SBS - click HERE if you'd like to read it. It's quite a fascinating read about what happens to a shaken baby, supplied with images.
The color of the hat is purple because it represents the abbreviation for "period of P.U.R.P.L.E. crying."
Click HERE for another article about SBS (on the Mayo Clinic web page) that talks about this issue - print it for new parents to read. Spread the word. Help them be educated even before their baby is born.
Watch THIS  EXCELLENT VIDEO to understand this crying period, which is explained by Dr. Ron Barr, a world expert on infant crying.
THIS VIDEO explains more about SBS and how to prevent it.


Articles, videos, and P.U.R.P.L.E. hats could help parents to prepare for this difficult time, especially new parents whose babies are more vulnerable. Some children never cry, some cry a little, some cry a lot. And parents of infants that cry a lot will have to train themselves to have a lot of patience.
The purple hat, if worn by a child, could remind parents to stay "calm" when frustrated, and find ways how to deal with the situation. If you know of any new parents, share the links above with them and knit a purple hat as a gift.

I decided to knit few hats for the cause mentioned above. See a couple of links below for places that need P.U.R.P.L.E. hats. I hear that hats should be preferably unisex, from relatively soft yarn (not to scratch babies' skin), hats must fit newborn babies, and they should be minimum 50% purple.

For visual knitters, I made a video of a simple hat (for my right-handed video click HERE and if you are a left-handed knitter click HERE) so if you prefer knitting along click on these links. I made three hats using three different yarns: a sports yarn (#3 - light weight) for babies, and two types of worsted yarn (#4 - medium weight). All same unisex style to be worn by a boy or a girl.

Places where hats are needed at this time (August 2017) as I write this post:


Abbreviations:
CO - cast on
K - knit
P - purl
DPN - double pointed needles
K2tog - knit 2 stitches together
BO - bind off

Gauge:
My gauge corresponds to a manufacturer's gauge on any yarn label


PATTERN #1 FOR 

Both hats were knitted with same knitting needles

Hat #1 & Hat #2 


Purple Hat #1 from Snuggly Wuggly yarn (Sof Lilac color)

Hat #2 from Shawl in a Ball yarn (Mindful Mauve color - use purple part)

Materials (if you shop online via my affiliated links below, I would get few pennies, which would help to fund my future projects TXS):
Michaels online store, OR Hobby Lobby, OR Jo-Ann Fabrics, OR Walmart 

Yarn for Hat #1: about 1/4 ball of Loops & Threads, Snuggly Wuggly; color Soft Lilac; 100% acrylic; 5 oz/141 g; 446yrds/408 m

Yarn for Hat #2: the purple part of Lion Brand; Shawl in a Ball; color: Mindful Mauve; 58% cotton/39% acrylic; 3 % other fiber; 5.3 oz/150 g; 518 yd/473 m; Note: I made 2 hats from one purple part of the yarn; this yarn is surprisingly soft to the touch

Double Pointed Needles or circular needles - size #5 (3.75mm), and #6 (4mm)
Hook - size #D
Yarn Needle (for weaving in the tail)
Scissors

Size:
Circumference: 13"-14"
Height: 6" (without the antennae)


Step-by-Step:

CO 70 sts on #5 (3.75 mm) long (or circular) needles and knit ribbing

Row 1              *(K1, P1)* - repeat to end (35x); then distribute stitches evenly among 3 DPNs (24-24-22 sts on each needle), connect into circle (make sure stitches are not twisted)
Rnd 2-14         *(K1, P1)* - repeat 35x in each row

Note: Switch to #6 (4 mm) knitting needles and finish knitting the entire hat with this size

Rnd 15-28       K70

Decreasing for top:

Round 29          *[K8, K2tog]* - 7x
Round 30          K63
Round 31          *[K7, K2tog]* - 7x
Round 32           K56
Round 33          *[K6, K2tog]* - 7x; (total 49 sts)
Round 34          *[K5, K2tog]* - 7x; (total 42 sts)
Round 35          *[K4, K2tog]* - 7x; (total 35 sts)
Round 36          *[K3, K2tog]* - 7x; (total 28 sts)
Round 37          *[K2, K2tog]* - 7x; (total 21 sts)
Round 38          *[K1, K2tog]* - 7x; (total 14 sts)
Round 39          *[K5, K2tog]* - 2x; (total 12 sts)
Round 40          *[K4, K2tog]* - 2x; (total 10 sts)
Round 41          *[K3, K2tog]* - 2x; (total 8 sts)
Round 42          *[K2, K2tog]* - 2x; (total 6 sts)
Round 43-?       K6 in each row until your tube measures about 4 inches.

BO by pulling yarn through all stitches, weave in the ends. Tie the knot and give it to some one.


PATTERN #2 

Materials For Hat #3


Purple hat #3 - from Caron Cakes (Bumbleberry color)


Caron Cakes worsted yarn #4; Bumbleberry (purple variegated) color; 80% acrylic/20% wool; 7.1 oz/200g; 383 yd/350 m
Double Pointed Needles or circular needles - size #8 (5mm)
Hook - size #F
Yarn Needle (for weaving in the tail)
Scissors

Size:
Circumference: 13"-14"
Height: 5" (without the antennae)


Step-by-Step:

CO 60 sts on long (or circular) needles (5mm)

Row 1              *(K1, P1)* - repeat to end; then distribute stitches evenly among 3 DPNs (20-20-20 sts on each needle), connect into circle (make sure stitches are not twisted)
Rnd 2-12         *(K1, P1)* - repeat 30x in each row
Rnd 13-24       K60

Decreasing for top:

Round 25          *[K8, K2tog]* - 6x
Round 26          K54
Round 27          *[K7, K2tog]* - 6x
Round 28          *[K6, K2tog]* - 6x; (total 42 sts)
Round 29          *[K5, K2tog]* - 6x; (total 36 sts)
Round 30          *[K4, K2tog]* - 6x; (total 30 sts)
Round 31          *[K3, K2tog]* - 6x; (total 24 sts)
Round 32          *[K2, K2tog]* - 6x; (total 18 sts)
Round 33          *[K1, K2tog]* - 6x; (total 12 sts)
Round 34          K12
Round 35          K2tog - 6x; (total 6 sts)
Round 36-?       K6 in each row until your tube measures about 4 inches.

BO by pulling yarn through all stitches, weave in the ends. Tie the knot and give it to some one.


***

DID YOU FIND ERRORS? Let me know on what page of my blog, and in which row by clicking HERE, and I will fix it as soon as I get to it. You can PM me on my FB Page HERE as well. Txs!
Also if you haven't subscribed to my HandmadeRukodelky Channel, you can do it HERE. There are many videos to be seen, too.

*******************************************************************************


Copyright page - click HERE


PLEASE, COMMENT ON YOUTUBE BELOW MY VIDEOS, AND/OR SHARE YOUR IMAGES OF YOUR RECREATED WORKS ON MY FB PAGE HERE :-)


Note: Most of the time I work as fast as I can to keep up with knitting and crocheting requests. I have to videotape, edit videos, then convert them & upload them to my channel. After that often I post on my blog patterns. I answer many questions, which means that often I work up to 16 hours a day. I would tremendously appreciate IF anyone of you who finds an error in the written pattern, so please, let me know - where (what rows) and what may be the problem. Many future knitters & crocheters from our artsy and crafty virtual world will thank you for your good deed, including myself.